
Hello Everyone!!!
It's Neha here. With the arrival of New year comes new beginnings and a new challenge at Lulupu. I am super excited to announce the very first challenge for 2015!
Challenge # 44
Fancy fold cards
{Qualification Guidelines Here}
Challenge Rules
1. Make fancy fold cards, show us your creativity- it can be any fancy fold card for eg. an easel, accordion, gate fold, bendy fold, criss cross or a Z fold card but we did love to see something new!
2. We have Twist for this challenge- You have to use punches- border, flower or shape punches. More punches you use, more chances of winning.
3. You have time until 15th January 2015, 11:55 PM IST to submit your projects.

And here's a look at my project for this challenge. I have made a circle side step card and also prepared a tutorial for the same.

Steps:
1. Start with a circle of CS measuring 6" in diameter (size of the circle and step measurements can be adjusted).

2. Measure 4" and mark on the circle.

3. The steps will be on the right hand side of the card, so all the measurements and marks will be on the right of the first line drawn. Starting at the bottom of circle, measure and mark a horizontal fold line at 1 1/2", then add another line 1/2" above the first, another line 1" above the second, then 1/4" above the third and finally add a line 3/4" above the fourth (the fold lines will be at 1 1/2", 2", 3", 2 1/4" and 4").

4. Using a craft knife and ruler or a trimmer cut between the first fold line and last fold line (cut between the two two X).

4. Using a craft knife and ruler or a trimmer cut between the first fold line and last fold line (cut between the two two X).
5. Crease along all the fold lines drawn in step 3. Without creasing the card on the left of the first line you drew, carefully line up the bottom and top edges of the card and add your center fold.

6. Next fold each of the steps starting at the bottom with a mountain fold, followed by a valley fold, mountain fold, valley fold and mountain fold.

7. When the card is closed the right hand edge is not nice and rounded so just cut off the excess. It's easier to do this from the back of the card where you can follow the shape of the CS.


8. Now the card is ready to be decorated as per your choice.
8. Now the card is ready to be decorated as per your choice.

Here is the final look after decorating card. I have also made two tags for writing personal messages.

Some closeups


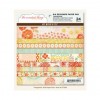
The pattern paper I used is from My Mind's Eye- the sweetest things. I have used different border and flower punches, various die cuts, pearls, lace, charms, liquid pearls etc. Pearl spray, stick pins and small flowers are handmade.
Sentiments is handwritten, heat embossed using golden EP and then used a black pen to trace outline. The edges of PP and die cuts have been inked with Distress ink- Fired brick. Die cuts and couple cameo (Print out from net) were Heat embossed using Clear EP.
I have prepared two tags as well which fit in the space behind the two die cut hearts.
I hope you like my inspirational card. Looking forward to see all your beautiful work!
Supplies used from Lulupu.com
Supplies used from Lulupu.com


Beautiful card....liked the challenge with twist...TFS...!!
ReplyDeleteGorgeous card,, love the color and all the elements here!
ReplyDeleteGorgeous card.......loved the use of punches here!
ReplyDeleteThis is wonderful!! Happy New year to all :)
ReplyDeleteWOw ..Its Beautiful..the shape,fold,colors,diecuts , flowers everything ! Thanks for the step-by-step photos n tutorial Neha !
ReplyDeleteWhat a beauty Neha!!
ReplyDeleteCheers
Dr Sonia
Cards Crafts Kids Projects
:) What a way to kick start the challenge ! Lovely card Neha !
ReplyDeleteWow !! its such a gorgeous card Neha..you have added so many beautiful details here..love everything about it !!
ReplyDeleteLovely card Neha. Very nice use of punches!! The card fold looks complicated but the end result is so pretty.
ReplyDeleteVery pretty card Neha!! I loved the aura of love surrounding the card!
ReplyDeleteThanks you everyone :)
ReplyDeleteMarvelous card, Neha!! Beautifully decorated ....loving that pink and red combo!
ReplyDeleteWhat a wonderful start for this creative challenge!!
So many beautiful elements Neha. Thanks also for the tutorial.
ReplyDeleteWow the card is lovely .. :)
ReplyDeleteLinked up my card...thanks :)
ReplyDelete