Showing posts with label Challenge # 44. Show all posts

Tuesday, 13 January 2015

Guest Designer- Sindhu Manokaran plus Tutorial

Hello Friends!!! 
Neha here
I am happy to introduce our guest designer for this fortnight and it's
Sindhu Manokaran
from Colors of my crafty world
She was winner of our previous challenge. Over to Sindhu.....


Hi I am Sindhu Manokaran and I am so excited to do my first GDT post. Thank you Karuna and Lulupu team for this wonderful opportunity.
I am from Tuticorin, Tamilnadu now residing in Mumbai, happily married and blessed with two lovely kids. I have been crafting since my childhood days. Other than drawing my first craft is flower making and making Ganapati idol with different materials. I tried my hands on embroidery, rangoli, sewing and origami. My son's school projects turned me towards papercrafts. "whats new this time" asked by my family and friends drive me to do more and more crafts. 

Now about my card. I have made a trifold book card for the current challenge. 


Flowers and leaves are punched ones. Corners are rounded using corner punch. Sentiment is handwritten.


 I have also kept some space for writing down some wishes. The 3 tier cake was made with MS doily lace punch, swirl and mini heart punch. I just loved it. The balloons are made to pop out by using an acetate sheet.


Gift opening will reveal an accordion fold card for wishes. 


Back side...


Fabric tape is used for banners. I have used more than 15 punches in this card. To complete it, I have further done faux stitching. 
Here is the accordion fold.


Hope you all like my card.

 A short tutorial for this card.
Step 1: Take a 6"*12" CS as a base and 4"*2.75" piece. Score the base card at 0.75". 4", 7.5". Mark 1" from the top in both the middle panel and cut it and 2" from the top in the first panel and cut it. This is to make graduating layers. 


Step 2: It looks like this. Folds like an accordion card. 


 Step 3: Adhere 4"*2.75" piece to first panel and your base is ready. If you want you can stick both the middle panel to make a book or leave it as it is like an accordion card which I have done.


  Wow that was really awesome Sindhu!! What a fabulous take on our current challenge Fancy Fold cards
Thank You so much for sharing your creativity and tutorial with us. 
I Hope her card has inspired you to join in all the fun at Lulupu here
You still have two more days to go!!!!


Monday, 12 January 2015

Squash Fold Card

Hello and Welcome to all the dear readers. I hope you all are still in the New year mode :)

This is Dolly here and today I will be sharing my take on the first challenge for 2015 - "Challenge 44: Fancy Fold Cards".


I have a made a "Squash Fold Card". This card looks really different from the usual two folds and opens up to surprise the receiver. To make this card, I used 3 pieces of card stock (15x15 cm), which were scored 4 times (horizontally and vertically) to create the folds. To add interest, I overlapped the pieces so that there were 3 hidden folds in the card. Once the card base was ready, I used some pattern paper from Prima and some butterfly punches from Martha Stewart to finish the card. The top and base for the card was a 9 x 9 cm pattern paper with rounded edges. I also went ahead and added a snowflake die cut to the top of the card. The sentiment used inside is from Altenew stamps.
For more details, you can refer to Crafting Geek video tutorial.

Here are some more pictures to show how the folds look like:


So, hope you all are inspired to try a unique fancy fold card and don't forget to link it for the Challenge 44: Fancy Fold Cards:)

Thank you for stopping by and I will see you soon with an interesting project next time!

Loads of love,

Dolly

Monday, 5 January 2015

Bendi Fold Card Tutorial

Hello Everyone!

It's Manu here today.

A very Happy New Year to all the readers of Lulupu from my end!! I'm pretty excited to join the Lulupu team and I hope that our amazing DT team brings in newer creations and techniques for you to get inspired by and that we spread a lot more joy and happiness to all of you in 2015.

The very first challenge this year is of 'Fancy fold Cards' but of course with an interesting twist. the twist is to use punches in your creations.

Here's my take on the current challenge. I have made a Bendi fold card and also have step by step instructions for you for you to check out !!


Lets checkout on how this card was made.

1. Cut out the card stock measuring 6*7 inches (the base flap), 3*6 inches (the left flap), and 2*6 inches(the right flap)
On the base flap, mark a line from 2 inches from the right side. On the left hand flap, score the flap from 1 cm from the left hand side(this goes behind the base flap for adhering) and 1 cm from the right side and cut a tab with sloping sides from each end leaving the tabbed area.
On the right hand flap, score 1 cm from the right hand side(this gets adhered to the base flap) and 1 cm from the left hand side and cut a tab. Check out the second pic to give a more clear idea.

Keep the left flap on the base flap aligning with the bottom and make a mark of where the tab is on the line drawn earlier. Using a craft knife cut along this marked area so that the left flap can be inserted into this slot.
Do the same keeping the right flap on the left flap, cut along the marked area off 2 cms on the left flap.

Check the marked vertical lines on the flaps. I'm sorry for that hazy look in the pictures, they somehow turned a little hazy!!

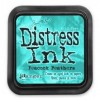
2. Adhere the left flap and the right flap on the back of the base flap and insert the left flap into the slot on the base and the right flap into the left flap's slot. Ink the edges of the complete card with Peacock Feather's Distress ink. 


3. Here comes my little twist to the Bendi fold. I wanted my flaps to be a little bigger. Hence I used another 2 pieces of cardstock and adhered to the left and the right flaps, keeping a little height difference to make it a little more appealing. My base is ready!!!
Now is the time for making the card more appealing...Bring on all those pretty papers... !!! I have used the Anna Marie Paper Pad from Prima.  

Here's the final look of the card both from the outside and the inside!!


Here's a closeup of my most favorite part of the card, the flower cluster and the pretty Whimsy stamped image!!


The Pattern papers are from Anna Marie Paper Pad from Prima. The cute birdie is an Whimsy image. It has been colored using the watercolor pencils. The sentiments inside the card are from Justrite and Technique Tuesday stamps.

I hope that you liked my take on this fortnight's challenge!! Do show us your take on this pretty challenge and link up your entries here.

Supplies used from the lulupu store:


Friday, 2 January 2015

Challenge 44# Fancy Fold cards and Tutorial


Hello Everyone!!! 
It's Neha here. With the arrival of New year comes new beginnings and a new challenge at Lulupu. I am super excited to announce the very first challenge for 2015!

Challenge # 44

Fancy fold cards

{Qualification Guidelines Here

Challenge Rules

1. Make fancy fold cards, show us your creativity- it can be any fancy fold card for eg. an easel, accordion, gate fold, bendy fold, criss cross or a Z fold card but we did love to see something new!

2. We have Twist for this challenge- You have to use punches- border, flower or shape punches. More punches you use, more chances of winning.

3. You have time until 15th January 2015, 11:55 PM IST to submit your projects.

 Winner of this challenge will receive a
Punch Mini Pennant Set


And here's a look at my project for this challenge. I have made a circle side step card and also prepared a tutorial for the same.


Steps:
1. Start with a circle of CS measuring 6" in diameter (size of the circle and step measurements can be adjusted).


2. Measure 4" and mark on the circle.


3. The steps will be on the right hand side of the card, so all the measurements and marks will be on the right of the first line drawn. Starting at the bottom of circle, measure and mark a horizontal fold line at 1 1/2", then add another line 1/2" above the first, another line 1" above the second, then 1/4" above the third and finally add a line 3/4" above the fourth (the fold lines will be at 1 1/2", 2", 3", 2 1/4" and 4").


4. Using a craft knife and ruler or a trimmer cut between the first fold line and last fold line (cut between the two two X).


5. Crease along all the fold lines drawn in step 3. Without creasing the card on the left of the first line you drew, carefully line up the bottom and top edges of the card and add your center fold.


6. Next fold each of the steps starting at the bottom with a mountain fold, followed by a valley fold, mountain fold, valley fold and mountain fold.


7. When the card is closed the right hand edge is not nice and rounded so just cut off the excess. It's easier to do this from the back of the card where you can follow the shape of the CS.


8. Now the card is ready to be decorated as per your choice. 


Here is the final look after decorating card. I have also made two tags for writing personal messages.


Some closeups


The pattern paper I used is from My Mind's Eye- the sweetest things. I have used different border and  flower punches, various die cuts, pearls, lace, charms, liquid pearls etc. Pearl spray, stick pins and small flowers are handmade. 

Sentiments is handwritten, heat embossed using golden EP and then used a black pen to trace outline. The edges of PP and die cuts have been inked with Distress ink- Fired brick. Die cuts and couple cameo (Print out from net) were Heat embossed using Clear EP. 

I have prepared two tags as well which fit in the space behind the two die cut hearts.

I hope you like my inspirational card. Looking forward to see all your beautiful work!

Supplies used from Lulupu.com