Hello Everyone!
It's Manu here today.
A very Happy New Year to all the readers of Lulupu from my end!! I'm pretty excited to join the Lulupu team and I hope that our amazing DT team brings in newer creations and techniques for you to get inspired by and that we spread a lot more joy and happiness to all of you in 2015.
The very first challenge this year is of 'Fancy fold Cards' but of course with an interesting twist. the twist is to use punches in your creations.
Here's my take on the current challenge. I have made a Bendi fold card and also have step by step instructions for you for you to check out !!
Lets checkout on how this card was made.
1. Cut out the card stock measuring 6*7 inches (the base flap), 3*6 inches (the left flap), and 2*6 inches(the right flap)
On the base flap, mark a line from 2 inches from the right side. On the left hand flap, score the flap from 1 cm from the left hand side(this goes behind the base flap for adhering) and 1 cm from the right side and cut a tab with sloping sides from each end leaving the tabbed area.
On the right hand flap, score 1 cm from the right hand side(this gets adhered to the base flap) and 1 cm from the left hand side and cut a tab. Check out the second pic to give a more clear idea.
Keep the left flap on the base flap aligning with the bottom and make a mark of where the tab is on the line drawn earlier. Using a craft knife cut along this marked area so that the left flap can be inserted into this slot.
Do the same keeping the right flap on the left flap, cut along the marked area off 2 cms on the left flap.
Check the marked vertical lines on the flaps. I'm sorry for that hazy look in the pictures, they somehow turned a little hazy!!
The Pattern papers are from Anna Marie Paper Pad from Prima. The cute birdie is an Whimsy image. It has been colored using the watercolor pencils. The sentiments inside the card are from Justrite and Technique Tuesday stamps.
I hope that you liked my take on this fortnight's challenge!! Do show us your take on this pretty challenge and link up your entries here.
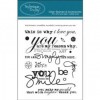
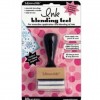
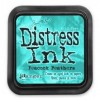
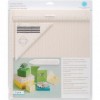
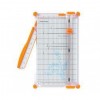
Supplies used from the lulupu store:
A very Happy New Year to all the readers of Lulupu from my end!! I'm pretty excited to join the Lulupu team and I hope that our amazing DT team brings in newer creations and techniques for you to get inspired by and that we spread a lot more joy and happiness to all of you in 2015.
The very first challenge this year is of 'Fancy fold Cards' but of course with an interesting twist. the twist is to use punches in your creations.
Here's my take on the current challenge. I have made a Bendi fold card and also have step by step instructions for you for you to check out !!
Lets checkout on how this card was made.
1. Cut out the card stock measuring 6*7 inches (the base flap), 3*6 inches (the left flap), and 2*6 inches(the right flap)
On the base flap, mark a line from 2 inches from the right side. On the left hand flap, score the flap from 1 cm from the left hand side(this goes behind the base flap for adhering) and 1 cm from the right side and cut a tab with sloping sides from each end leaving the tabbed area.
On the right hand flap, score 1 cm from the right hand side(this gets adhered to the base flap) and 1 cm from the left hand side and cut a tab. Check out the second pic to give a more clear idea.
Keep the left flap on the base flap aligning with the bottom and make a mark of where the tab is on the line drawn earlier. Using a craft knife cut along this marked area so that the left flap can be inserted into this slot.
Do the same keeping the right flap on the left flap, cut along the marked area off 2 cms on the left flap.
Check the marked vertical lines on the flaps. I'm sorry for that hazy look in the pictures, they somehow turned a little hazy!!
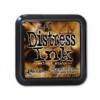
2. Adhere the left flap and the right flap on the back of the base flap and insert the left flap into the slot on the base and the right flap into the left flap's slot. Ink the edges of the complete card with Peacock Feather's Distress ink.
3. Here comes my little twist to the Bendi fold. I wanted my flaps to be a little bigger. Hence I used another 2 pieces of cardstock and adhered to the left and the right flaps, keeping a little height difference to make it a little more appealing. My base is ready!!!
Now is the time for making the card more appealing...Bring on all those pretty papers... !!! I have used the Anna Marie Paper Pad from Prima.
Here's the final look of the card both from the outside and the inside!!
Here's a closeup of my most favorite part of the card, the flower cluster and the pretty Whimsy stamped image!!
The Pattern papers are from Anna Marie Paper Pad from Prima. The cute birdie is an Whimsy image. It has been colored using the watercolor pencils. The sentiments inside the card are from Justrite and Technique Tuesday stamps.
I hope that you liked my take on this fortnight's challenge!! Do show us your take on this pretty challenge and link up your entries here.
Supplies used from the lulupu store:



Such an adorable card Manu........lovely colors. Thanks for sharing the tutorial.
ReplyDeleteBeautiful card ..:)
ReplyDeleteLovely card Manu!!!! I loved that cute image and floral arrangement!!!!
ReplyDeleteLove the curved front and two level flaps. But d cutest is d image. Thanks for d tutorial too.
ReplyDeleteWhat a beautiful card Manu ..I love this fold and the pretty colors and embellishment on your card..Thanks for the tutorial too :)
ReplyDelete