
Hello Dear Readers,
Hope you are enjoying the current challenge and the lovely creations the Design Team is whipping out every week. Hope you all are inspired to re-look into your die collections and create something wonderful. Do not forget to link your creations for the chance win a beautiful die from Memory Box
Today I will be sharing a tutorial for a cute little baby pram I made (Warning: Loads of step by step pictures). This can be used as a lovely gift for a new mommy. For all the supplies used for this project, refer to the links below
Steps:
1. Using a doily die (any circular die would do), I created 2 doilies which were then cut in half i.e. semicircles. This was used as the body of the pram/cradle.


2. The semicircles were placed apart with the help of a rectangular strip of paper cut according to the gap needed in the pram. This piece was stuck to the semicircle. Tip: To easily adhere the rectangular strip, just score 1/4th of an inch on both the side, and fold, this portion can be used to stick to the insides of the semi circle.

3. To create the base, another piece of the rectangular strip with the same width as the first one should be used. The length of this strip should be a bit more, since its curved into a U shape to form the base. This piece can be stuck to the top portion. Once again scoring the strip helps to create good gridline to adhere the base.


4. To make the wheels, I simply cut out 4 circles and attached to the semicircles.

4. To make the wheels, I simply cut out 4 circles and attached to the semicircles.
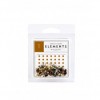
5. To create the top part of the pram, I used a punch to give some interest to long strips of paper (approximately 5 strips). These were then attached to the body with the help of brads, which allows movement of the strips as per your liking. I created the shelter by adjusting the strips. The last strip was added as a pulley on the other side.


6. To decorate the pram, I used some flowers and pearl embellishments from my stash. I also added some candies in the pram to fill it with some sweetness


Hope you enjoyed going through the step by step tutorial and the pictures! Go ahead and explore your own collection to see what goodness you can create! We would love to see them.
All the best for this challenge!
Thanks for stopping by!
Love,
So Adorable !
ReplyDeleteIts so adorable and pretty..Thanks for sharing the tutorial ..Need to give this a try :)
ReplyDeleteThanks Pooja and Hussena :)
ReplyDeleteVery cute. Must try sometime.
ReplyDeleteInformative post.
ReplyDeleteBaby Pram Suppliers