Monday, 15 June 2015

Art Journal Escape

Hello friends,

Its my second post this month, my turn to share something that I'm working on right now. Instead of sharing my latest layout, this time I've decided to take you behind the scenes and share how I discover and practice / discover new techniques, products

This my friends is one of my Art journals, the one in which I experiment and try out different products, colour , media combinations and techniques and that's why it stays behind the scene. Days when I don't have a project in progress, these pages are waiting to be experimented on. Experimenting means  there is no pressure to create anything that's picture pretty, no restrictions, just one ground rule - enjoy the process.  This also means there will be no cringing when a technique doesn't work out or when several colors pool together and result in a black mess.


After filling up nearly half the book, finally altered the cover of the journal this weekend. I first sealed the chiupboard cover with gesso and then went to town with a whole heap of media - texture paste through stencils, mists, sand texture, glass glitter and finally stamping with archival inks.

Here is a peek at one of the inside pages - texture paste applied through cling wrap; overheated gesso so it bubbles, glass glitter + gesso through stencil and the list goes on. 

I hope you find some crafty arty time this week and try something new. Don't forget to have a look at our challenge this month: Summer Splash and link up a project to win some goodies.

Cheers,
Kripa

Friday, 12 June 2015

Sea themed cards

Hello Everyone, 

Dolly here today, I am popping in real quick to share a couple of cards I made for this month's beach theme. 

We have some entries lined already and you still have loads of time to be inspired and create anything which goes along with our theme. 


For my first card, I have used watercolors to create the background in shades of blue and stamped the cute fishes along with the sentiment. The hearts are hand drawn. To complete the card, I have used some twine.


For my second card, I tried making waves of the sea using different colored papers by just tearing them with hand. I layered them on the main card and hand drew the sun and the boat ( felt like a small kid at school). The sentiment added was from Tim Holtz - small chat.


For the third card, I used an embossing folder from Tim Holtz to create the background. The flag banner was hand drawn and colored. I used some wood patterned paper from My minds eye to create the lifesaver ring which was placed on a jute patch. The sentiment is from Tim Holtz again.


Thats all from my side guys. I hope you are feeling inspired to create something beachy and summery

See you all soon!

Love
Dolly


Supplies available at Lulupu:

Wednesday, 10 June 2015

Pop up Box card: Inspired by the sea!

Hello Everyone!

This is Manu here with my take on this months challenge!

The Summer season has been a smashing one here in the Northern area with the sun at it's peak, and the only respite one can feel is a real summer splash!! and what's better than a summer splash theme here at the Lulupu blog. 
Checkout all about the challenge here at 

I interpreted the theme keeping in mind the heat and a beach is the best way to beat the heat!! Yes, I have a it'a-all-about-the-beach card for you and needless to say, I loved the way this one came out to be. Here's what I made!


Yes, it's a POP-up card and I love them, to bits!! They are soo much fun to make and the wow factor associated with them is amazing!!!
The most amazing thing with this card is that it can be folded flat to put it inside an envelope and send it and when opened up, it pops up into a box shape, this is one 3D card which I truly love. Versatile and full of sparkling goodness!


I have a tutorial on how I did this one and lets check it out!
(A lot of tutorials are there on the internet for this card, but I tweaked this a little to suit up to my dimensions).

1. Take a 15*9 inches cardstock and score it at 4", 7", 11" and 14".  Now invert the cardstock on your Martha Scoreboard and score at 4".  

2. Cut off the 1" piece with the Tonic Scissors from the side you choose  to be the top portion of the pop-up box as shown in the pic. 

3. Now fold this cardstock to form a box shape and glue using the Tacky glue the left over 1" portion with the other end of the cardstock. You would get a a pop-up box in this shape. Take two one inch stripes and paste them inside of the box as shown, these strips will be used for the placement of different embellishments. 
Now choose your pattern papers and as per the dimensions of the pop-up box, cut them out and stick on to the card.


4. Now comes the turn to embellish the pop-up box card to your hearts desire and this is what I did.
I loved the way this pop-up box came out to be. Such a bright, chirpy and all bluish card!
Don't you loved those blue ocean waves?? I had fun making those!


The Lawn Fawn stamps sure makes this card a pretty one!! Lawn Fawn is one brand which I truly love!

Here's the view of the card when folded up! 

And a fold the other side! 

Here are a few close up of the critters! (Ohh I so love them, I know that I have been saying this from the start, but then LAWN FAWN is one awesome brand which comes up with such amazing cute and fun stamps.)


All these critters are colored with Normal markers and The Copic's are in my yet-to-buy list and I'm sure I'll soon lay my hands on those! 

I hope you all liked my take on the current challenge!! This is one sooper one and there can be soo many interpretations, and what more, you can always choose from the beach or the nautical way to express out those lovely creations.
Do not forget to enter your creations here, and also do let me know if you liked my interpretation of this months challenge!

Happy Crafting!
Manu

 Supplies used from the Store:


Monday, 8 June 2015

A Shaker Card

Hello friends!
This is Tanvi here with my take on Challenge#50.
For my inspiration I decided to go make a card with the "beach" theme. To create the sand texture I added a few drops of Vintage photo reinker to DecoArt Texture sand paste, very happy with the outcome. Do you agree? 


The shaker element of the card is the sea. For this I sprayed a piece of CS with LSG starburst Blue Hawaiian Blue & let it dry. I randomly stamped dotted curves to create the waves (Colorbox Aqua). Some adorable sea creature charms I had in my stash were perfect creatures for the shaker!


And finally this is the full reveal of the card!


Hope I have inspired you today to participate in the current challenge! Hope to see your creations soon! 

SUPPLIES AVAILABLE AT LULUPU - 

Friday, 5 June 2015

Inspired by the sea - Mixed Media Canvas

Hello friends,

Kripa here with my take on this months challenge

For a while, Ive been wanting to create something about my favorite affirmations. One of them is the subject of my canvas today. Its very easy to get frustrated and run down by a sea of emotions resulting from the challenges life throws our way. But, if one takes a different perspective, from the same set of events/ challenges will arise inspiration, balance and inner peace. Happiness is a choice, not a result.

Ive interpreted Summer theme with the waves of the mighty sea and a ship in a bottle! Cant imagine making a project without my Silhouette Cameo. All the shapes - anchor, seahorse, sea weed, ship in a bottle, birds, sand dollar and a few other random shapes have all been cut with the Silhouette machine.

The background has lots of texture paste, sand texture, gesso - black and white, crackle paste and a variety of fabric, mesh, tissue paper. There were a dozen techniques used to create interesting texture, here is one : apply a fairly thick layer of texture paste. Stamp into it when semi dry. Remember to wash your stamp immediately. Ive stamped Kaisercraft texture stamps and Tim Holtz embossing folder to create patterns in the texture paste. Scroll down to read all the supplies from the Lulupu store used for this project.


Our theme this month can be interpreted in many different ways. Click here to read all the details. I hope to have inspired you in someway today, look forward to seeing your take on this challenge.


Cheers,
Kripa
List of supplies from the Lulupu store


Wednesday, 3 June 2015

Winners challenge # 49

Hello everyone!!!!
Neha here to announce the winners for the Challenge # 49: Feminine - Use wings & Color Palette. We got 20 amazing entries. Loved all of them. Now lets checkout who all have won.

Starting with Top 3 (in no particular order)

Jaya


Lovely layout with pretty colors on a kraft background

Mayoori


Super cute layout with awesome color combination and embellishments. 

Deepti


Beautiful card with lovely colors and butterflies escaping from the jar.  


And here is the Winner

Kavitha


What a stunning layout! We just loved the pretty colors, textures, layers and beautiful details. 

Congratulations winners!!! Please contact hello@lulupu.com to claim your prize and don't forget to grab your badge. All the winners, please grab your respective badges from Here.

Looking forward to see your entries for our current challenge Summer splash 
Have fun!!!
Hugs
Neha


Monday, 1 June 2015

Challenge # 50 - Summer Splash - Tutorial to make a light house

Hello friends!!!
Its Neha here again with a new monthly challenge for you all. Summers are at peak now and its getting very hot here in North India. Scorching sun, heat waves all are making it just impossible to step out of home. This calls for a summer splash theme this fortnight as a bit of relief (lolz). 

Lulupu challenge # 50
Theme: Summer splash
(Click here to read the general guidelines)

1. Emphasis on Summer splash- You can either go for a beach theme ( anything related to beaches) or nautical (related to sea, navigation in the sea, sailors or maritime. You can choose elements like anchors, lifebuoys, ships, lighthouse etc.) 
2. Anything goes- you can make card, layout, canvas, mini album, 3 D project etc. as long as its related to the theme
3. You have until 30th June 2015 11:55 IST to submit your entries. 

Winner for this month challenge will get a gift bag from Lulupu store. 


Lighthouse
And now comes my project for this month's challenge, I decided to go with a nautical theme so I made a lighthouse. I have a small tutorial for you as well. I am very happy the way it turned out finally. I made it from scratch using chipboard, then covered it with a very light shade blue pp. Then spritzed some handmade sprays and LSG sprays. Used gesso, Texture paste and white sand resin with stencils to add some texture. The top part was made using a sturdy CS and windows were cut using a die from spellbinders. It also has space for a LED candle. I also used stickles glitter glue and liquid pearls at some places
** Also note that the back section of the top part opens up so that LED candle can be switched on/ off. The door and windows were hand cut. Used a resin frame over the window and wood veneer bird was placed there. Over the front window I used a metallic corner. Roof was also made using a CS and I had put a umbrella charm in its center. The base was made using a circular piece of chipboard. gessoed it and covered it with moss and some beads. A hand drawn and hand cut lamp-post was also placed along the lighthouse. Finally spread some sea- shells here and there randomly. And it was done.
Some more pics. It looks much more bright, shimmery and beautiful in real than in pics.


Just have a look at the texture!


With LED candle switched on

Here is the step by step tutorial for it:
1.Take four chipboard pieces. you can decide the length and width as per you choice, But they all should be of same size.


2. Trim all the chipboard pieces so that its width is slightly lesser on one side. As the light house is narrower on upper portion.


3. Covered all the pieces with PP. I chose a light blue PP with small white polka dots.


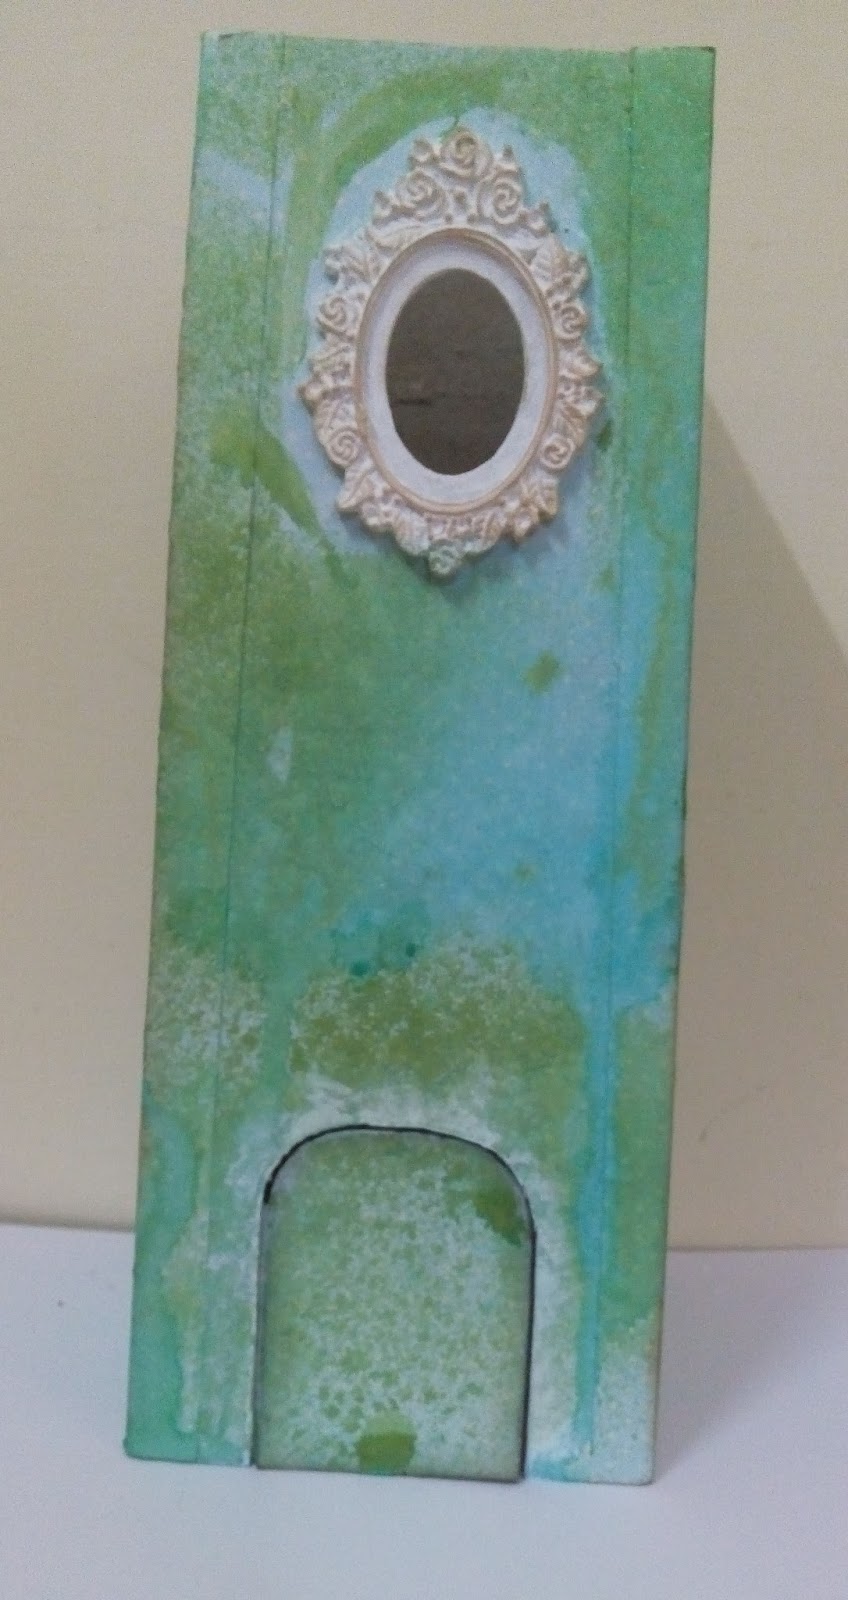
4. Next on one chipboard piece cutout a door and on another one an oval window. Keep the door cut out, as it will be used here only.


5. Now comes the steps to assemble all the chipboard pieces together to make the lower body of the light house. For this cut 1" strips of a sturdy CS and score them at 1/2". These strips will be used to attach the pieces.


6.  Now put glue on them and add one side of them to one piece of chipboard from inside as shown in pic. Glue the other part to the other chipboard piece. Attach the other two pieces in the same way. Now You can also cover the edges with 1" pieces of PP. Attach the cut out door also the main body in the same way.


7. Now comes the fun part. Spritz sprays in your choice of color. I used a homemade spray in teal color and LSG spray in green color.
8. Take a resin frame and a metal corner and cover them with gesso and distress them with vintage photo DI. Glue this resin frame over the window.


9. Now comes the top part which includes a box and a window kind of thing. For box part take a square CS and score it 1/2 " on all sides. Make cuts as shown in the pic and fold at all scored lines glue the flaps inwards. It should fit on top of the lighthouse body like a cap. So keep this in mind while deciding its measurements.


For making window section take a strip of CS and score it at equal intervals. the width should be a little less than the box. Also score it at 1" on top and bottom. Cut at each score line.


Cut out windows using die of your choice. Join the two ends together and its done. I have kept the back part of window open so the LED candle can be switched on/off.


10. Next comes roof, I was pretty confused in the beginning as how should I do it. It also has two parts; a box and a roof. Make a box as above but of smaller measurements than the window part. 

For roof take a piece of CS and score it diagonally on both sides and at both the centers too (I forgot to click pics for this part). Fold on all the score lines. Take a point 1/2" above on one center score line and join it on both the corners. Cut out this part. Do this on the opposite side too. Now fold it on the score lines and  its ready. Now I was stuck again as how to put it, as it must have a raised center. I had cap of a used fevicol bottle. I gessoed it and colored it. glued it in the center of the box. Then placed the roof over it and glued its corners on the box. Finished with some pearls and a twine. 
Wrapped  LED candle with vegetable netting and put it inside. These all parts were colored with sprays, gessoed, stenciled with texture paste and white sand. 
11. For base take a circular piece of chipboard and gessoed it. Glue some moss and for making sand part add some beads of same color.  I also used some Prima glass glitter. Add some pollen siciks some netting and sea shells 
And its done!!!! 
I hope you like it!!! I would love to see you all participate in this month's challenge!!
Hugs!!!
Neha

Link your entries here:


 Supplies from store: