
Hello Everyone!!!
Manu here wishing you a happy month full of love and warmth!!
It's February already and Valentines day is just around the corner, did we mention that this month is the month of LOVE all around?? We did not wante to deviate from LULUPU's tradition of celebrating and circling this month around the lovey dovey creations, hence the challenge theme is : Love you SWEETS. You can find all the details of the challenge here.
Here's my take on this months theme!! I have created a cute little cupcake with a hidden message inside. I have a picture tutorial for all of you to enjoy and which is quite a big one too, so grab up your favorite beverage and enjoy this tutorial.

Wondering where the message is??? Sit back and hold on, check out on how this pretty thing was made.
1. Here's the list of the things required to make this cupcake.

- You will be needing a thick cardstock or a sturdy packaging sheet from any box, about 8*8 inches(I used the hardcover of a Cadbury's celebrations gift pack),
- Pattern paper of your choice
- A thermacol ball (I could not get it so used a Smiley ball for my project)
- Double sided tape
- Ribbons
- Love theme stamps
- Pearls
- Flowers, glitters, liquid pearls (Embellishments of your choice)
2. Cut the Smiley ball in half and make sure to get an even cut throughout (the more even cut, the better).

3. Carefully line up small pieces of double sided tape (I lined up 2 pieces on top of each other to give me more space inside).

4. Now, cut a cardstock tag which fits in the 2 pieces of the ball when they are joined back together. You can always adjust the height. Make sure that this tag can slide in and can be pulled out easily when the ball is put back together. (Still wondering on the Hidden message?? This might have given you an indication *wink wink)

5. I wanted my base for the cupcake to be a little stronger, hence I used a thick packaging cardstock. Draw a circle with diameter 6" and 2". Now, draw 8 lines end to end (that makes 16 lines)as shown in the pic. Cut these lines till where the 2" circle is drawn. The next picture explains better.


6. Now hold all the elongated stripes and tie a rubber band to hold them, Also place your Smiley ball inside and make the desired shape for the cupcake. Carefully glue the flaps with one another and then when this step is done, glue the smiley ball along with this base structure of the cupcake.

7. Cut out 2 stripes from the pattern paper of your choice and score them at 1/4" apart. Then fold them into an accordation fold. Paste this stripes of paper on the lower end of the base structure of the cupcake.

8. Now cut out a ribbon of your color choice about 4 -5 times the circumference of the smiley ball. We'll start with pasting this ribbon from the lower area where the pattern paper meets the smiley ball. Take the ribbon and pass your needle (with the thread in there, of course) and keep pulling the thread at regular intervals. You will end up getting a ruffled up ribbon like in the picture shown.

9. Now attach the ribbon to the smiley ball with the help of the glue gun. Make sure that it covers the entire area nicely and the inside smiley is all hidden. I made the Cream ribbon ruffle similarly and pasted it.

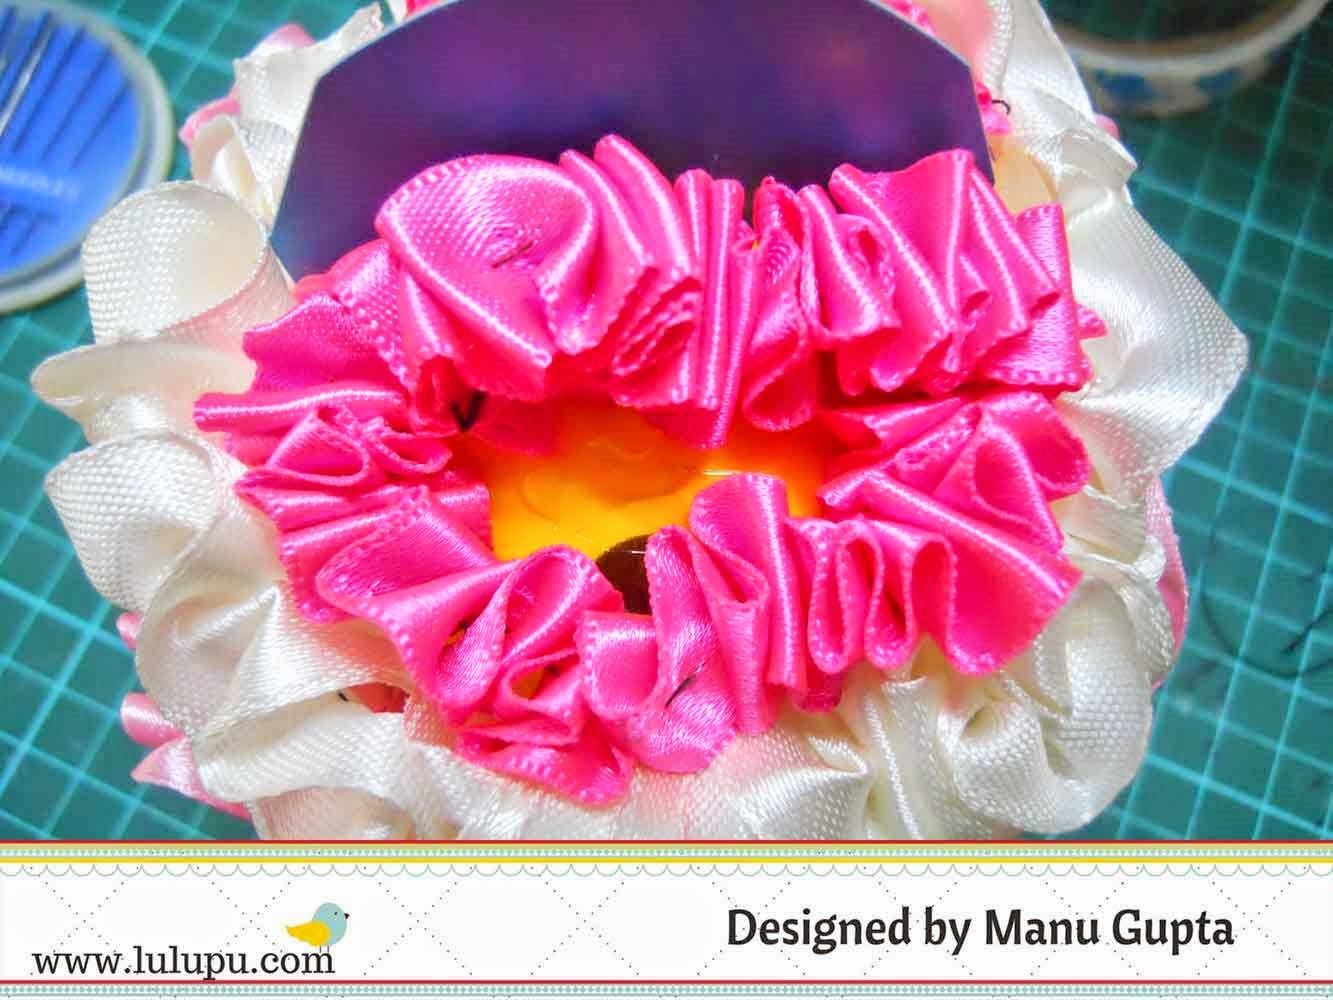
10. Once you get to the edges of the tag(the one which slides in and out) attach the ribbon as shown in the pic both in front and at the back of the tag. This will ensure that the ribbon does not get entangle in the tag and ensures the smooth sliding of the tag.
11. Ohh we forgot to make the tag, here's my sweet hidden tag inside the Smiley ball.
Embellish your cupcake as desired.!!!

I used some pearls, glitter and more pearls on the ribbon (scattered here and there to look like cute sprinkling, ready to pop in the mouth).


Phew, that was one long tutorial!!! But I'm sure you must have liked it and do make your own cupcakes this Valentine's!!!
I hope you all liked my cupcake and do not forget to tell me how this one tasted!!!
Do not forget to link back your entries here and get crafty and taste in the flavour of love all around!!
Supplies used from the store:


