Monday, 5 January 2015

Bendi Fold Card Tutorial

Hello Everyone!

It's Manu here today.

A very Happy New Year to all the readers of Lulupu from my end!! I'm pretty excited to join the Lulupu team and I hope that our amazing DT team brings in newer creations and techniques for you to get inspired by and that we spread a lot more joy and happiness to all of you in 2015.

The very first challenge this year is of 'Fancy fold Cards' but of course with an interesting twist. the twist is to use punches in your creations.

Here's my take on the current challenge. I have made a Bendi fold card and also have step by step instructions for you for you to check out !!


Lets checkout on how this card was made.

1. Cut out the card stock measuring 6*7 inches (the base flap), 3*6 inches (the left flap), and 2*6 inches(the right flap)
On the base flap, mark a line from 2 inches from the right side. On the left hand flap, score the flap from 1 cm from the left hand side(this goes behind the base flap for adhering) and 1 cm from the right side and cut a tab with sloping sides from each end leaving the tabbed area.
On the right hand flap, score 1 cm from the right hand side(this gets adhered to the base flap) and 1 cm from the left hand side and cut a tab. Check out the second pic to give a more clear idea.

Keep the left flap on the base flap aligning with the bottom and make a mark of where the tab is on the line drawn earlier. Using a craft knife cut along this marked area so that the left flap can be inserted into this slot.
Do the same keeping the right flap on the left flap, cut along the marked area off 2 cms on the left flap.

Check the marked vertical lines on the flaps. I'm sorry for that hazy look in the pictures, they somehow turned a little hazy!!

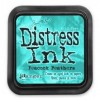
2. Adhere the left flap and the right flap on the back of the base flap and insert the left flap into the slot on the base and the right flap into the left flap's slot. Ink the edges of the complete card with Peacock Feather's Distress ink. 


3. Here comes my little twist to the Bendi fold. I wanted my flaps to be a little bigger. Hence I used another 2 pieces of cardstock and adhered to the left and the right flaps, keeping a little height difference to make it a little more appealing. My base is ready!!!
Now is the time for making the card more appealing...Bring on all those pretty papers... !!! I have used the Anna Marie Paper Pad from Prima.  

Here's the final look of the card both from the outside and the inside!!


Here's a closeup of my most favorite part of the card, the flower cluster and the pretty Whimsy stamped image!!


The Pattern papers are from Anna Marie Paper Pad from Prima. The cute birdie is an Whimsy image. It has been colored using the watercolor pencils. The sentiments inside the card are from Justrite and Technique Tuesday stamps.

I hope that you liked my take on this fortnight's challenge!! Do show us your take on this pretty challenge and link up your entries here.

Supplies used from the lulupu store:


Friday, 2 January 2015

Challenge 44# Fancy Fold cards and Tutorial


Hello Everyone!!! 
It's Neha here. With the arrival of New year comes new beginnings and a new challenge at Lulupu. I am super excited to announce the very first challenge for 2015!

Challenge # 44

Fancy fold cards

{Qualification Guidelines Here

Challenge Rules

1. Make fancy fold cards, show us your creativity- it can be any fancy fold card for eg. an easel, accordion, gate fold, bendy fold, criss cross or a Z fold card but we did love to see something new!

2. We have Twist for this challenge- You have to use punches- border, flower or shape punches. More punches you use, more chances of winning.

3. You have time until 15th January 2015, 11:55 PM IST to submit your projects.

 Winner of this challenge will receive a
Punch Mini Pennant Set


And here's a look at my project for this challenge. I have made a circle side step card and also prepared a tutorial for the same.


Steps:
1. Start with a circle of CS measuring 6" in diameter (size of the circle and step measurements can be adjusted).


2. Measure 4" and mark on the circle.


3. The steps will be on the right hand side of the card, so all the measurements and marks will be on the right of the first line drawn. Starting at the bottom of circle, measure and mark a horizontal fold line at 1 1/2", then add another line 1/2" above the first, another line 1" above the second, then 1/4" above the third and finally add a line 3/4" above the fourth (the fold lines will be at 1 1/2", 2", 3", 2 1/4" and 4").


4. Using a craft knife and ruler or a trimmer cut between the first fold line and last fold line (cut between the two two X).


5. Crease along all the fold lines drawn in step 3. Without creasing the card on the left of the first line you drew, carefully line up the bottom and top edges of the card and add your center fold.


6. Next fold each of the steps starting at the bottom with a mountain fold, followed by a valley fold, mountain fold, valley fold and mountain fold.


7. When the card is closed the right hand edge is not nice and rounded so just cut off the excess. It's easier to do this from the back of the card where you can follow the shape of the CS.


8. Now the card is ready to be decorated as per your choice. 


Here is the final look after decorating card. I have also made two tags for writing personal messages.


Some closeups


The pattern paper I used is from My Mind's Eye- the sweetest things. I have used different border and  flower punches, various die cuts, pearls, lace, charms, liquid pearls etc. Pearl spray, stick pins and small flowers are handmade. 

Sentiments is handwritten, heat embossed using golden EP and then used a black pen to trace outline. The edges of PP and die cuts have been inked with Distress ink- Fired brick. Die cuts and couple cameo (Print out from net) were Heat embossed using Clear EP. 

I have prepared two tags as well which fit in the space behind the two die cut hearts.

I hope you like my inspirational card. Looking forward to see all your beautiful work!

Supplies used from Lulupu.com


Thursday, 1 January 2015

Happy New Year and Welcome Design Team 2015

Hello Everyone,

Karuna here! Firstly wish you all a very Happy and Prosperous New Year! Hope you all had a fabulous time with friends and family.

With new year there are new beginnings and some heart break good byes. Like you have read from our last few posts the Design Team from 2014 shared their goodbyes along with there best projects they enjoyed creating during their stint. I, for one was indeed very very nostalgic to see them leave. They had become family here at Lulupu. I will always cherish there friendship :) Wishing them all a very crafty and happy future. They have been so generous to share their ideas, creations and inspirations with all of us and I hope you carry on to follow them on their personal blogs too!

Thank you so so much Jaya, Hussena, Deepti and Shilpa.


With that we come to our new team for 2015. We had a Design team call and an overwhelming list of applications which were screened. We are happy to announce and welcome 4 very talented ladies on our team! Please welcome them and come back tomorrow for the launch of our very first challenge for 2015 by the new team!

I’m Manu, a software professional turned Craftpenter :) having interest in varied kinds of art and crafts and someone who enjoy's making handmade things. 

I'm a mom to a 1 year old cutie pie and she's made life all the more enjoyable and fun! 

I started with paper crafts and ventured into the crafting world accidently while going through a card that had been posted by one of my friends. A bit curious, I asked and got to know that it's done through quilling, thus started my search on the internet and I bumped and bumped into loads of information and that's when I decided to take this hobby of mine forward. 

I find crafting extremely satisfying and relaxing and it just brings out a smile when someone is happy because of my work!!! 

I'm blessed to have a loving and a supporting husband by my side along with the love of our lives, our little baby!!!
I’m so so excited to start 2015 with the fabulous Lulupu’s Design Team. I’m sure that I’ll get to learn lots of new techniques  and ways of crafting, and also that, Lulupu will make an awesome place to showcase my creativity. 

Pharmacovigilance Scientist by profession and card maker by hobby! I was introduced to the world of card making in my school days. I started out with simple cards and have slowly moved on to learn new techniques and different types of cards. 

The world of card making fascinates me and always inspires me to create!

Lulupu has always been my go to and trusted craft shop in India. Getting a chance to be on the team has been a dream so far which now sees the light of the day. I am super excited and happy to be a part of Lulupu and looking forward to a creative year 2015!

Hello everyone this is Neha here!!!! I am from Jaipur and I have done Ph. D in Biotechnology and have worked as post doctoral fellow for about two years before I came to Ghaziabad after marriage. I had keen interest in crafting, sketching and painting since childhood. Currently as I am not working anywhere so I have lot of time to spend it for my hobbies. I try to learn and use new techniques and styles and don’t want to restrict to a particular one. I really enjoy mixed media projects, using different mediums and textures. Shabby chic and vintage style is my favorite. I like making cards, mixed media canvases, 3D projects, and scrapbook layouts. I use both bright and bold colors as well as soft colors depending on the kind of project.

I am very excited and happy to join Lulupu design team as I will be working here along with some of the best talent in blogland.
Hello! This is Tanvi from Bengaluru, India. 

Crafting has been a passion since childhood & along this creative journey I have tried several crafts & paper crafting is my current my addiction. I have an active blog since October 2012.

I love new products & exploring techniques using them. Being part of a design team provides the opportunity to interact, learn & work with talented people across the globe! 

I hope my work on this design team inspires you too. Thank you Karuna for this opportunity.
--------------------------------

And Exciting news is we have our dear Kripa continuing for another term here at Lulupu! So that's a wrap! Am super excited with our new team all geared up and i Hope you come back tomo to check out our first challenge for 2015!