Monday, 17 March 2014

Mixed Media Scrapbook Layout

Hello and Welcome Beautiful Crafters,
 Shilpa here,
First of all, I would like to thank you all for overwhelming response to Lulupu's 2nd Birthday Celebration!! 
and
Challenge # 27
Lulupu 2nd Birthday Special

Today I am presenting you a Mixed Media Scrapbook Layout, which is made for our
 'Boss' - Karuna, with her and her dear Junior Moose's photo on it! ( just kidding, she is a lovely lady.)
And here it is..


When I was thinking what colors to use on a layout my starting point is the photo. Is there a palette I can use? Yes there is - Pink, peach, red and light green. You will find those are the colors, I've used to create a Layout.
If you stuck with which colors to choose for any creation, you can search on net,
I find these two websites very useful - Design seeds and Pinterest.
Caution - They are very addictive :-)


I've used a Mixed Media paper from Prima,for the base, which is new in the Lulupu store with fab designs. They are sturdy to take any abuse, which works perfectly for me, as I love to use lot of mediums.
You know, how much I like texturing. So to make a background I've used Sakura modelling paste and stencil. I've applied the Lindy's flat fabio ink with my brush(didn't not spritzed), which gave me a control of ink's movement. I also stamped with the  Archival ink and text stamp. You can see this at the top right corner of LO.


The next layer is with American Craft's XoXo collection pattern papers. I distressed the edges with Comfort Craft Distressing tool (a must have for any crafter)


The chipboard letters are colored with acrylic paints. I've used lot of Prima Sugar dots on the background.


The center circle is created with white paper rope.
Embellishments - Most of the flowers are from Prima, others which are handmade are colored with LSG starburst sprays. Some diecut flourishes added the beauty. They are colored with Memento Dew drop Inks.

Let's see which are the letters I've used
L- Layers, Lindy's sprays, leaves


P - Pink and peach colors, Pattern papers, Prima flowers, Prima sugar dots, paper rope, punches, pearls, pollens
T- Texture paste,
C- Chipboard letters,Cheery lynn dies

Hope I've inspired you to create a layout for someone you love and care.
 I always like to here what you think...
Thanks so much for stopping by today.

Lots of Love,
Shilpa
 

Materials used:


Saturday, 15 March 2014

Friends Forever Frame!

Hello Friends!

Are you having fun yet with us? Yes its Lulupu's second Birthday this month and the celebrations are on full swing! Do click here to have a chance to win this months Raffle!

I thought what better way than me joining the fun too and share an inspiration for the current Challenge# 27? So I got my act together and decided to work with the gorgeous papers from American Crafts Flea Market Paper collection from the store to finish this Frame lying with me for so long now :)

I worked with these letters from the current challenge for the Category 2

L - Layers, Leaves
T - Texture paste, Teal colour
C - Circles

To begin with I used a single sheet with gradient colours in teal for covering the entire frame in one go with Mod Podge. Once it was dry I used my Fingertip Control Craft Knife to neatly cut of the extras. I find the Sweetheart Distressing Tool perfect for sanding the edges for a smooth finish.

Once done i began to work with a Crafters companion Mini Punchenila Stencil and used only the hexagon patterns with the Sakura Modelling Paste with my Palette Knife to create a texture.

Once dry I enjoyes misting and spraying with Tibetan Poppy Teal and layer it with some Curiouser Chartreuse Flat Fabio. the blend looked perfect.

Now its all about embellishing it! So here is my frame before we get into more details. Its also my first try with mixed media so I hope you like it.


Remember the gorgeous collection of Prima Flowers added at Lulupu Store recently? I have used 
the Mixed Wildflower and picked made some coordinating flowers for this corner. All the flowers and leaves belong to this collection. I love this pack as it has so much variety.


For the circle element in my frame i picked this pattern paper from the stack that had some really pretty circle designs. 


I used my EK Success Circle punches to punch these out in various sizes and then create a pattern on the right side


Then I have used more misting and spraying to blend it with the background. And to complete it I have embellished with some Sugar dots! Ta Da!

There is still time for you to join us this month as we have tonnes of prizes for you to win!


Supplies Used from www.lulupu.com

Wednesday, 12 March 2014

Guest Designer - Bipasha & Bricking Technique Tutorial!

Hi Friends,
It's Hussena here and today we are so happy to bring to you a very talented crafter who just loves to "WOW' us with her amazing creations every time. Her work is always so elaborate and meticulous with so many fabulous details that one can't help but admire her work and if you are still wondering who it is, well  its none other than, Bipasha :) And, here's what she has to say about herself!
                                                                       

Bonjour my dear crafters! I am Bipasha from Assam. I always had a deep craving towards any form of art since childhood but studies and a constant drive to attain a remarkable career kept me always busy and far away from it. I seriously started making cards and scrapbooks from the March, 2012 and created my blog “CreateUr World” after I stepped onto the corporate world as a software engineer in Tech Mahindra,Hyderabad. For me, crafting acts as a stress buster, a relaxation from the busy work schedules and hectic daily routines and by now it has become a big-time addiction !!

If I‘m asked about my crafting genre, I will have to say that my style is an ever-changing art form. I don't think I have a particular style as I am always inspired by everyday events and moments. I tend to create highly dimensional projects, I think it really sets a different idea as to what can be created with just paper.

I am truly amazed to see so many ambitious and brilliant crafters in this magical crafty blogland, and I make it a point to learn something new from them each time and can proudly say have made a hell lot of crafter buddies . And what else? A lot of there is still to explore within me! 

Lastly, my sincere thanks goes to Karuna and the super - awesome Lulupu team for selecting me as a Guest Designer.

And here is my Inspiration for you today, as per the current Challenge#27 - Lulupu 2nd Birthday Special.  I have made a MDF birdhouse 3D project.

Ohh my my and have you seen the yummy goodies to be own, I couldn’t help myself drooling over them! 

My project consists of 4 letters out of the 5 given options:

L- Layers, Leaves

P- Pattern papers, Pollens, Paints,printables

T -Triple Thick gloss glaze

C - Clock,charm

PICTURE HEAVY POST!

Click on the images to see a larger version of the image..

This is how the MDF House looks :


Close-up of the details : 


And this is how the back of the house looks :

Here, I have implemented a very simple yet radiant technique to create the front look, which I call as “bricking technique” and it being very simple (and cost-efficient :P !), I thought you must give it a try too !

Materials required: 

• Trimmer 

• patterned paper (preferably little vintage-y will work wonders!) 

· Sandpaper or Distressing tool 

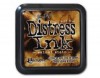
· Tim holtz Distress ink pad(preferably dark shade, I selected walnut stain) 
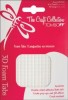
· 3D foam 

Instructions: 

Step 1: Trim equal strips of paper from a light and dark shade PP. 

Step 2: Distress the edges of both the strips. 

Step 3: Stick the darker shade strips spaced at equal lengths on the desired-shape base layout. 

Step 4: Slightly distress the edges of the lighter shade smaller pieces with a distress tool or sand it 

Finally, I added those pieces to the wall with 3D foam for extra dimension. 

I hope you all like my project! Do leave me your comments or any queries regarding any of the products used here and I will get back to you as soon as possible :) 

Happy Crafting!!

Hugs, 
Bipasha

Isn't this such an amazing creation ?! It is sure to inspire you all for our current challenge - Lulupu 2nd Birthday Speical :)
Thank you so much, Bipasha for this wonderful tutorial and sharing your beautiful, beautiful project with us. As always, you have managed to 'WOW' us again.
And, please do leave her some love in the form of comments. We would love to hear from you! :)

Monday, 10 March 2014

How To - Family - Shadow box Tutorial

Hello ! Ola ! Namaste !
Welcome to another post from me, Pooja!
I am very pleased to present to you my mixed media shadow box for


Yooo hooo ! We are celebrating Lulupu's 2nd birthday !
And there are some amazing prizes to be won !
Check out the original post here for the full details of the challenge
Also look at the line up of prizes here

There are 3 categories to play for ! so just remember to link them at the right place !

Well for me i decided to go for 
Category -3 ~ Everything else ! 

Here is my mixed media shadow box  
 

Friday, 7 March 2014

Special Birthday & Shaped Card!

Hello Beautiful Crafters,

Valou here,

Hope you had a peaceful week! We have a fabulous special Challenge this month

 Challenge#27 Lulupu 2nd Birthday Special

Before I begin here is my thought process for this project.

Starting with alphabets..we have to use L, U, P, T, C

Let's see What I have used here?


L: leaves, lavendar
C: cardstock
P : papers, pastel shade


Here is my card for this challenge and I hope that it will inspire you!


For this card, I used a decorated flowers paper ( small block)and the edges are distressed with "Old Paper" DistressInk.

The shape of the card is a template found on the Internet which I printed in two different sizes. I then cut with simple scissors.


I used a rubberstamp "Magnolia". 

I then colored in the following way: 

- Ink "Distress Tattered Rose" and "Distress Vintage Photo" for the skin.
- Ink "Distress Antique Linen" and "Distress Walnut Stain" for hair. 
- Ink "Distress Worm Lipstick". 
- Ink "Distress Shaded Lavender".
- Ink "Distress Forest Moss".
- "Glitter Stickels Frosted Lace".

I cut the image and I stuck it with "Foam Tape" on a die-cut created with "Cuttlebug" and a dies " Spellbinders-Nestabilities - Circles ". The edges of circle white circle under the image is inked with the ink "Shaded Lavender" then covered with "Glitter Stickels Icicle".


I have used various flowers to decorate my card. Flowers are covered with some touches of "Glitter Stickels Icicle".I also added "Foliages" created with a die by" Cherry Lynn Designs ".


The title is printed and i used a font called " Chopin Script ". I then cut it in banner shape to sue on my card.


Finally, I added a butterfly created with a die by " Joy! Crafts ". Above, I stuck another butterfly made with a small punch and I decorated it with two white pearly demies-pearls.


We are looking forward to your amazing entries to drool over!


I wish you an excellent day and bye for now!


Wednesday, 5 March 2014

Winners for #26 - Try Something New!

Hello everyone,
Firstly, let me thank each and everyone of you who participated in our last challenge- Try Something new. We really got some amazing entries and you guys really impressed with your creativity and talent.

But, here I would like to mention that MANY of you all,  have NOT FOLLOWED our rules before entering our challenge. Please people, do read the rule the challenge guidelines that we post before every challenge. Some of you, have either back-linked or entered in more than 5 challenges including ours which is one of our top rules. It really saddens us when you entries get disqualified because of not following the rules! Hope you all keep this in mind while participating in our current birthday celebration challenge as we don't want anyone of you to lose your chance to win the exciting prizes up for grabs! :)

Now, on to the Winner's. First up, are our Honurable Mentions in no particular order :

Sujana's centre step card is so beautifully done with the cute quilled element taking the centre stage. We totally loved her concept!

Poornima's gorgeous double pocket card with the amazing color and background stole our hearts

Deepti
Her cute adorable and perfect CAS card card is such a delight especially considering most of the elements on her card are hand-drawn and cut.

Nupur 
Her elegant and neat card is  so beautiful and her coloring skills are just superb !And we loved her unusual color combo as well !

Now, on to the Top 3 again in no particular order :

For her first blog post, Dharshana 'WOW-ed' us with her neatness and beautifully executed spinner card for which she has also shared a step-by-step tutorial. How lovely is that!

Jaya's unusual colors and beautiful floral arrangement combined with the beautiful use of the Alpha Wood Veneers really impressed us a lot!

This beautiful accordion fold card with so many amazing details and gorgeous floral arrangement caught our attention immediately!

Winner of Challenge # 26 is ...
This classy and perfectly executed lattice card with awesome coloring and fussy-cutting by Indira made us all sit up and take notice. Love the refreshing colors as well!

Congrats to all the winners. Please click here to get your blinkies!

We have a month long challenge for our second birthday celebration and three categories and loads of opportunity with some amazing prizes up for grabs. So, please do participate in our current challenge # 27 -Lulupu 2nd Birthday Speical