This is Valou here. Hope you all are fine today.


We have a sketch challenge for you this fortnight .
Challenge#32-
Sketch Challenge
CHALLENGE GUIDELINES-
(General Guidelines here)
1.We are providing you a basic sketch to act as an inspiration to start your project.
2.You can modify the sketch (rotate, mirror image) to create your cards , scrap book layouts, or altered canvas.
3.The elements of the sketch , the colours are completely your choice. The sketch is just a guide to your creativity.
4. Cards, Scrapbook Layouts and Altered canvases are allowed in this challenge.
Note- You may change the elements of the design .The buttons can become banners or torn/folded edge. You may also play with the shapes of the layers.
We understand that the sketch cannot be followed in its entirety so we allow for variations as long as it looks that the sketch was considered.
So here is the sketch for Challenge #32-
And now for the prize that is up for grabs this time!!!
Spring Bloom Paper Pad 6.5"X6.5"
For this card, I used a paper "Wild Rose Studio" and some paper " white Bazzil Cardstock ". Edges are used with "Old Distresser". In every corner, I stuck half a white pearly pearl.
On the top of the card, I stuck a die-cut " Border Butterflies " realized with "Cuttlebug" and a dies " Joy! Craft ".
I colorized it in the following way:
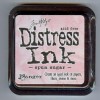
- Ink "Distress Tattered Rose" and "Distress Vintage Photo" for the skin.
- Ink "Distress Antique Linen" and "Distress Tea Dye" for hair.
- Ink "Distress Victorian Velvet".
- Ink "Distress Pumice Stone".
- Ink "Distress Worm Lipstick".
I cut the image and I stuck it on a die-cut realized with a dies " Spellbinders-Nestabilities - Majestic Ovals ".
Any goshawk, I added "Glitter Stickels Diamond".
For the decoration, I added a white flower " Petaloo " and cloth flowers pink.