Showing posts with label Mod Podge. Show all posts

Wednesday, 30 December 2015

Washi tape mini Canvas & Au revoir

Hello creatives,

Kripa here, with my final project as DT for Lulupu - a mini canvas based on the theme this month
Deck up your Home with washi tape + mod podge
(Click here to read the full post on the challenge)

The first layer is pattern paper and torn strips of washi tapes (
Glitter Light Gold Japanese Washi Tape, Gold Script Japanese Washi Tape) on a Kraft base. Next is a layer of texture paste through a stencil. Finally, more pieces of torn washi tape and some embellishments.


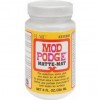
Washi strips added just the right interest to the background, enough to not use any stamping at all! The challenge with using washi was that it wouldn't stick on texture paste and because I used small torn strips it was even more difficult keeping them down on the bumpy textures. Mod Podge Matte 4 oz came to my rescue, as it dries transparent, you can't even see it and those tiny pieces of tape will stay there forever! You have two more days to link your entries for this month's challenge here.

Its now time to say my final goodbyes. I've had a wonderful journey last two years with a very talented bunch of fellow designers and so much love from all of you for which I'm ever grateful. A huge thank you to Karuna, who trusted me (more than I did) with an invitation to join her DT at the time when I had just started scrapbooking. I will miss working with you.

Here are my favourite projects from this year.

This mini album is definitely top of the list for me as I discover the possibilities of creating interest with textures (minus wet media) You can see all the pages here and tutorial here.

Memory keeping is what attracted me to scrapbooking in the first place and I'm thoroughly enjoying creating in this altered book journal. You can see two more pages of this book here and here.

This year I made more cards than layouts. Click here to see closies of each card.

Another card which I really enjoyed making. Wish I had an endless supply of these cherubs. You can read through the tutorial here.

Finally, a reverse canvas inspired by the sea. More pictures and details here.

When I was going through my projects trying to choose favourites, it was easy to see how much my style has evolved through my time as a Lulu Pooh thanks to encouragement from my wonderful fellow DTs - Manu, Tanvi, Neha, Dolly and Karuna and all of you who read my posts and leave me comments - they mean so much to me.

I will continue to share my art journey on my blog - theColourPress and will be super thrilled if you visit me there.

Wishing you all a joyous 2016.

Au revoir,
Kripa


Thursday, 24 December 2015

Washi Tape Ideas & a Goodbye!

Good Morning!
Tanvi here today & sadly this is my very last post here.

This month the focus is on Washi tapes & Mod Podge, both very versatile products. Lulupu has a huge collection on washis in the store. These tapes are so handy to decorate/alter a project in a jiffy.

The summer fun 2 washi tape in my DT kit was just right to make a travel journal cover. I neatly covered the book with washi tape & embellished the cover. Over a period of time washi tape loses it tackiness & that’s where mod podge comes to the rescue!


I have added mod podge dimensional magic to the label die cut & polaroid wood veneer. The postcard & postal stamp are embellies I made with shrink plastic.


The antique 'passport' charm was a perfect addition to the page marker.


This is the back of the journal -


I also altered my mobile phone cover similarly &    have put together a pictorial for this - 

Glue several strips of washi tape diagonally to the phone cover until the back is covered as desired.


To add a bit of color I partly used a different washi tape.


With a craft knife, trim off the excess tape to get a neat finish.
Cut around the edge of the camera hole and also other slits on the cover. Add another layer of Mod-Podge to seal the washi tape. Let it dry for 24 hours and there you are, a one of a kind phone cover!


Remember you still have time to enter the current challenge. 
                                       
  As I mentioned, this is my last post here and time to say a final goodbye.
Thank you, Karuna, for the opportunity to work for Lulupu, the incredible support you always gave us & the freedom to think & execute made the tenure at Lulupu so much rewarding! Best wishes for your future endeavors. Lots of love to little “K” too! 
Kripa, Manu, Dolly and Neha, you have all been such inspiring and supportive teamies, let’s all stay in touch!
And lastly, sincere thanks to all the readers for constant support & encouragement. I will be active on my blog and FaceBook page, so stay connected !

Leaving you with some projects which I enjoyed making. 

                          The colours, the textures, the embellishments, loved everything but this clock.


This was one project with which I had a really hard time with, but loved the outcome. 


I had so much fun making this interactive baby album.


This tag book album is very special as I made my first video tutorial!


Thats it from me! Good bye :-)

Supplies from LULUPU.COM


Friday, 11 December 2015

Christmas Canvas with modpodge and washi tape

Hello friends,

Kripa here with my take on this month's challenge
(Click here to read the full post on the challenge)


My take is a Christmas themed canvas that can be used as a table décor.


The background is a Christmas themed gift wrap tissue glued down with mod podge and white gesso. Next Iore several pieces of washi tape - Gold Dotted Japanese Washi Tape, Gold Script Japanese Washi Tape, Glitter Light Gold Japanese Washi Tape before applying clear embossing paste through a stencil. Once dried, add more torn washi tape for extra texture and black to balance.


Also used washi tape to cut out paper bows for embellishments.


Supplies from the store:
Mod Podge Matte 4 oz
Gesso - Sakura Acrylic Tube
Glitter Light Gold Japanese Washi Tape
Koi Water Brushes Medium
Gold Dotted Japanese Washi Tape
Gold Script Japanese Washi Tape

Wednesday, 9 December 2015

Coasters with Washi Tape and Mod Podge - Tutorial

Hello dear readers!

How are you all doing? It’s the month of  festivities, Christmas is here and it’s time to decorate our houses and enjoy some family time! Our theme for this month is to ‘Deck up the halls’ and we would love to see how you would create stuff for decorating your homes. Remember, to use washi tape and mod podge to create your projects and win some awesome goodies from Lulupu!


For my project this month, I was going crazy, since washi tape and mod podge is such a hit combination. There is so much you can do. I chose to make some easy coffee table coasters for inspiration.


I have used different washi tapes and some pattern paper to make these coasters. You would need some stiff cardstock (I wanted to try making these with tiles, but unfortunately, I couldn’t find them at the local store), some felt paper for the backing, washi tapes, and the all-time best– Mod Podge. Just follow the pictorial below and I am sure you will be itching to create some of your own. These are great as gifts to your family and friends too!


Use the washi tapes to cover the surface of the cardstock and add a thin coat of mod podge to seal them. As you can see, I have tried different patterns with the same washi tapes. You can also try to mix and match with different combinations of washi tapes. The felt paper is added to the back side of the coasters to help it make anti- slip!


I also tried using patterned paper for a couple of my coasters and I loved how they turned out. I followed the same process of adding the patterned paper on the cardstock followed by adding a coat of mod podge to give the final finish.


For this coaster, I wanted to make it Christmas themed, hence I used a red cardstock to cover the base and then heat embossed some snow flake. After letting it cool down for a few minutes, I added a thin coat of mod podge to coat the top. Doesn’t it look so cute!

Here's how the coasters look :)


So, I hope you guys are already rushing to your craft room to make yourself and your friends some cute coasters!

Don’t forget to link your projects for this month’s challenge!

Love and warm hugs!
Dolly

Stuff from Lulupu:

Friday, 4 December 2015

Altered Bottle

Good Morning!
This is Tanvi, with my interpretation of the theme - Deck up your Home-Challenge#56.

I have an altered bottle - 


After a good wash in warm water I sponged gesso on the bottle & then painted it with chalk paint (again with a sponge). Lulupu store has an amazing range of Mod podge and lovely prints of washi tapes. Check them out here. My DT kit had some lovely washis & I used this awesome glitter washi tape to jazz up the nexk of the bottle. The jute twine & washi were held tight with Mod Podge. Added some charms & sequins too.


On the front of the bottle I glued some die cut from a Tilda paper pack & did some random stamping all around the bottle using coffee archival ink


Hope you like this project & join our last challenge of 2015. Please link your projects in the post here & find all the rules here.
Hugs,
Tanvi!

Supplies from LULUPU.COM -


Thursday, 7 May 2015

Easel Card with Butterfly Backdrop

Hello dear readers, 

Welcome to another new month of creativity, inspiration, challenges and super cool goodies to win from Lulupu. 

This months challenge is based on "Femininity", we have a lovely bright color palette to choose from and many chances to link your creations, For more details, check out the below link:


This week, I have a easel card to share with you all. The interesting part in this card is the butterfly backdrop which I have created with several punched out Monarch Butterflies which have been pre-distressed with the theme color (Salty oceanMustard Seed and Picked raspberry). To use the butterflies as the base I have adhered them with a layer of Mod podge, which helps in giving a very clean finish! I hope you like my very pink and feminine card and find inspiration to try something from your very own stash. 


Here is a close up of how the punched butterflies look :) Prettiness!


Well, That is from my side! Do leave some love :)

Thanks for dropping by!

Love,
Dolly


Supplies from Lulupu store:


Monday, 23 March 2015

How To: Image transfer using Mod Podge Photo Transfer Medium

Hello friends,

Have you all been enjoying the inspiration and games being presented this month for Lulupu's Birthday celebration? We are thoroughly enjoying visiting your blogs to see your linked creations.

My post today is a short tutorial on image transfer. Ever since I bought mod podge image transfer from the Lulupu store a few months back, I've been itching to try it out. The process is very simple:

Gather all your supplies:
1. Prints / photocopies of image : if you have a laser printout or an actual photograph, take a photo copy. The image will only transfer from a thinnish paper - photo paper is too thick. Also, remember that the transferred image will be a mirror image of the original, so if you have text or need a particular orientation, flip the image before printing.
2. Mod podge image transfer medium: comes with a foam brush for easy application.
3. Pattern paper (or canvas/ wood/ metal) onto which you want to transfer the image.
4. Mod podge matte to make the surface waterproof. Gel medium would also work for this.

Step1: Prepare the base on which you want to transfer the image. In my case, two sheets of Prima paper with a thin coat of white gesso. Once dry applied a coat of mod podge matte. This ensures the layers beneath are sealed and the surface is waterproof. (you will discover soon why waterproof surface is required)

Step 2: Cut out the image to be transferred, leaving no white edges. Apply a slightly thick and even coat of mod podge image transfer on the right side of the image. Place the medium side down on the patter paper and remove any air bubbles or crease on the paper by running. a brayer over it. This now needs to dry overnight.

Step3: Next morning, I ran a wet brush over the top of the image, let the paper soak up the water and gently rubbed over the paper with my fingers. Slowly, the paper started peeling off revealing the transferred image. Be gentle, or the paper can tear. Once all the paper is out, let it dry and give it a coat of mod podge to seal and protect.
As you can see, the transferred image isn't as bright as the original, so I touched it up using watercolour pencils and watercolours. Now I have two page dividers ready to go into my planner.

I'd love to see how you've used this product and see your creation. Also, don't forget to check out our Birthday Celebration challenge - there are more than the usual share of prizes to be won