Hey, friends!
This is Jasleen here, back with a new project, unrelated to this month's challenge theme.
First of all, I would like to remind you all that it's Lulupu's 4th birthday this year and we are celebrating it throughout the month of March. There's an amazing giveaway and super fun games with exciting prizes. Are you playing along? If you haven't started yet, you can still catch up and read all the details HERE.
For our current birthday themed challenge, please click HERE.
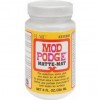
Today, I'm sharing a canvas wall art that I made using Mod Podge Picture Transfer Medium . I decided to use a Laser printout of one of my favorite pictures of my daughter.
Mod Podge picture transfer medium, as the name suggests, is used for transferring any photo over canvas, wood, ceramic or fabric. But the photo needs to be a Laser printout or a photocopy. It gives amazing and predictable results/ The only thing you need to keep in mind is the time- it needs to be kept undisturbed for 24 hours after it's application to get desired results.
I made a short and quick start-to-end video for the same. I hope you find the video helpful.
You can also view this video on our YouTube channel HERE.
I hope you liked it. Let me know if you have any doubts.
Supplies from Lulupu store :
Thanks for stopping by. Have a great day. :)
-- Jasleen


