
Hello!!!
This is Varshitha here.. Hope you all had a great weekend.. Mine was fantastic! I am super excited about the current Lulupu Challenge - #17, Load it Up!!! I love to load up my cards with lots of layers and flowers and still make them CAS cards too.. :P
When coming to floral projects I love handmade flowers and my love for handmade flowers was by seeing Rajni ji's and Erum's work. I am always stunned seeing their work. :) Seeing this inspiring world of crafting I decided to make these awesome Gardenis.I am so very excited to show them here... Being a lazy crafter its one of the easy way to make flowers, instead of pinching and molding each petal, these beauties can be done very easily.. Yes I'm showing you a small tutorial on how to make these Gardenias...
Now about my card ..... I have made a typical floral card. A Floral card is what I always prefer for loved ones, making my own flowers and gifting it as a card gives soo much happiness to me.
Here it is..

This challenge demands minum 3 layers and 3 embellishments and here's what I have done.
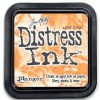
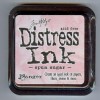
The base is an inked layer, the 2nd layer of white CS is also inked. 3rd The layer is of embossed card stock and I have inked it using Distress Inks giving a double shaded look. I don't know if someone has done it, this idea just came to my mind when inking the embossed CS. I used two colors to give a gradient shade look, where these two colors where the ones I used in the flowers. (Dried Marigold and Spun Sugar) and the last layer is the decorative diecut with the sentiment saying "Let your dreams take Flight". I used this sentiment having in mind my close friend who got engaged last week. Wish I could send this to her all the way in India.

Here are the embellishments I have used..
1. Handmade gardenias and some daisies
2. Distress glittered swirls
3. Prima gem flourishes
4. Enamel dots, pearls
5. Seam binding ribbon shaded with same two distress inks as final touch.

Hope you like my card for today.

I have also made a video tutorial on making easy paper Gardenias. Before watching the video, I would suggest you to read the supplies needed section below.
Here you go
Supplies Needed and Tips on choosing supplies for making this Gardenia Flower
Cardstock
Thickness of 95 - 100 gsm (Apx 65 lbs) should be perfect. Do check the flexibility and smoothness of a small piece of card stock by folding it twice or thrice and dipping in water and squeezing out the excess water. The CS should be perfect for crushing and tweaking, if it seems to be too mushy, it means it is too thin. If it is stiff and does not merge well, it is either thick or the CS is not absorbent so its not a right one. So always die cut or punch out from two or three different CS and try it to find the best for any florals.
Punch/Dies/Die Cuts
Pick out floral punch or dies with similar shapes which ll be apt for this particular Gardenia. Make sure it is 4 or 6 petaled one, which ll be easy for this folding method. Mine is a Digital die cut which i made according to the size I wanted. The big one (pink gold glittered) is 2.2" and the small one is 1.45" (Yellow orange gardenia). I made the hole in the centre in the die itself because piercing after the flower is made is so tough for me. For all lazy crafters like me the tip is to punch a center hole after you die cut or punch out which ll make things easy.
If you use a digital cutting machine and you want this same die cut design. Please comment and ask me the file, i can email you the .svg file. This is the design i picked from my softwares library uploaded by some anonymous user.
Ink / Inkpads / Coloring Medium
Take any sprays, ink pad or re-inkers which reacts with water. Distress Inkpad, Colorbox Pigment ink pad, Dylusion sprays worked out good for me. Do try out others too. Tell me what worked out best for you.
Embellishment
Typical centre embellishment I prefer for gardenia are Pollens/Stamens, you can also try DIY glittered stamens, flocking powder, Beads, Micro beads, etc.
Liquid Paper Crafting Glue
Like TomBow, Glossy Accent, Glue Gun or try any glue which your confident about.
A Used toddler or infant toothbrush OR Black Gen pen (Optional)
For adding black dots to your Gardenia
Quilling Needle Tool (Optional)
4mm Stylus for molding (Optional)
Right Angle Tweezer
Cup of water
Kitchen Towel Or Good Absorbent Cloth
Heat Gun
Craft Mat
Having my little one around I was not able to complete and upload the video with the post.
Finally here i am with the Video.. This is my first video and i am super excited. I really thank lulupu and team, who is soo encouraging.
Thank you,
Love
Varshitha.
Supplies Used -


Aww....super awesome fresh gardanias Varshitha. Thanks for mentioning.
ReplyDeleteI'm waiting to see ur video...i might learn something new.
Awesome blooms!
ReplyDeleteGorgeous card and even gorgeous flowers! These are simply superb! Cant wait to see a video tute on these
ReplyDeleteGorgeous card .. blooms are so stunning .
ReplyDeleteCan't wait to see the tutorial! Thanks in advance.
ReplyDeletefresh blooms and awesome colours varshita
ReplyDeletegorgeous !! :) waiting to hear you on ur video ! :)
ReplyDeleteHugs
pooja
SUper gorgeous card n the blooms are so beautiful ..I am waiting to see the video tut !!
ReplyDeleteHello Team Lulupu ! I followed Varshitha's tutorial and made the flowers and shared them on my fb page and other groups today and wanted to inform that I have linked this tut with the snaps.Thank you !
Deletesuper! they look beautiful. Thanks for the mention, I am humbled :)
ReplyDeleteLoved the video tute Varshitha!! Your voice is so sweet :) I liked your technique to make Gardenias. Will definitely try it out. Thanks a lot for sharing.
ReplyDeleteVarshitha grt so proud of u get work
ReplyDeleteI told u Varshitha...ur technique must be different thn what i use while making flowers....and yess ,it is.Its a wonderful tutorial...and ur flowers look more natural and real.I must thank you for sharing thys super awesome tutorial.....will try soon :)
ReplyDeleteThanks Varshitha for this great great tutorial. I have always been wondering as to how these flowers are made, and you have explained each and every step with so much of tips for a good start, will try out sooner and let you know :)
ReplyDeleteThank you for this tutorial!!
ReplyDeleteThese are beautiful. I would love to have the die. I have tried to make one and can't get it right. Email is crazycraftyduo.com. Thank you so much.
ReplyDeletethis is the svg file i made it with , please download it here.
Deletehttp://www.4shared.com/file/mfmBwZaMce/For_Gardenias.html
I just love your flowers.they are just beautiful.the best ones I've seen on utube.i am going to try these tomarrow.
ReplyDeletehey Varshitha , i totally love ur tutorial...plz can u tell me which dies uv used to make the gardenia petals ...
ReplyDeletethank you...
I have not used a die, its a svg file and you can download it here
Deletehttp://www.4shared.com/file/mfmBwZaMce/For_Gardenias.html
Love your flowers that video was great, thank you can I please have the name of the flower file I love to make my own, I don't buy flowers I love to make my own is so relaxing and more delicate to do it your self, I'm your fan from now on,
ReplyDeletederev77@hotmail.com
I am so glad you liked it.
DeleteHere is the link for the svg file
http://www.4shared.com/file/mfmBwZaMce/For_Gardenias.html
I love the flowers - can you send me the file please ?
ReplyDeletewhich embossing folder do you use for this card ?
ReplyDelete