
Hello bloggers !Its Pooja here today.
Happy new year to all the readers of lulupu from me :)
Hope u all are liking our new design team filled with so many talented ladies !
This fortnight we decided to go for Challenge #23 - Create a calendar.
So i decided to alter a journal cover and today i have tutorial on how i did the background.
So lets start !

I started off with this simple mini journal which has a plain hard cover on it.
I do like the pink so i am going to keep some of it showing.

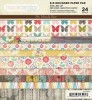
My next step was to add a pattern paper to the cover.
Over which I then used some texture paste with a stencil.
TIP - Notice the puckering ? (well dont worry, it wont show),
But I made the mistake of adding the tacky tape only to the sides of the PP , while i should have added it to the whole paper, or just used some thick white glue.

I then quickly added some glitter on top of the texture paste while it was wet.

Once dry you can dust off the glitter to reveal the pattern !
Thats pretty much how i got my background .

Then I placed the rest of my embellishments and my cover was done !

Here is a closer look at the flowers .
They are all handmade.

The tiny calender you see here is also handwritten.
The image is a Magnolia stamp , and i really enjoyed coloring it !
Hope you liked my project for Challenge #23 - Create a calendar.
and are inspired to join us in the fun !
Waiting to hear your thoughts !
Hugs
Poo
Supplies


What a beautiful altered journal cover, Pooja! And, I just love the tutorial you have shown for it! Your flower's look stunning <3 Thank you so much for sharing :)
ReplyDeletethanks hussena :)
DeleteSooooo cute!!! Loved it!!! I have got to get me some textured paste!! :)
ReplyDeleteVery cute card.
ReplyDeleteCute peoject.The flowers are beautiful.
ReplyDelete