Showing posts with label Cupcake Tutorial. Show all posts

Monday, 16 November 2015

Mini Album Tips - Maximise photo space

Hello friends,

Today, I'm back to share more about each page of the mini album posted a few days ago for this month's challenge
The earlier post had details of how to make the base of the album and embellishments, today's post is about how 4 pages can hold 20 photographs.
Tip 1: This is a really simple one. Make a pocket that goes half way through the page using lace. The base can be used to journal and the pocket holds a tag with photos on both sides. I would not put more than one tag in this pocket to ensure the seams don't tear or fold plus it's easy to put in and pull out the tag. Another idea is to tie a set of tags together with ribbon and add it inbetween pages. While the front can be used to journal or as is, the back of the tags can have photographs.
Tip2: Flip-open page held by washi tape can be used to add some hidden journaling or extra photographs. Simply use some washi tape over the edge of a piece of paper to make a hinge.
Tip3: Folded pages can be used for more photographs and journaling. Simply fold a rectangle in half, tie it close using a string or ribbon. For the recipient to know there is a fold, Ive used either arrows or tabs on the inside.
Here are the pages with the folds open. Inside one of the folded pages, I've added a small pocket and two tiny tags.
 Tip4: This fold is slightly different. Score a square piece of paper across the middle (making a plus so that you have 4 smaller squares), cut off one of the squares. Fold along the scored lines and you will get one 'side' opening and one 'top' opening fold.
The rest of the pages are single photo pages and can be seen here.

Through the rest of this month, the DT will be sharing ways of including more photos, so visit back often. 

Until my next post,
Happy Crafting!

Cheers,
Kripa


Monday, 2 November 2015

Challenge #55 - Make a Mini + Tutorial
Hello creatives,

Lets start with a round of applause for all who joined us last month - 53 gorgeous entries! I hope you all feel as motivated and enthusiastic about this month's theme

Make a Mini

(Click here to read all challenge rules)
Special rules for this challenge:
1. Construct a mini, don't use a ready available album (example mdf album)
2. You can use any binding, any theme
3. Submit entries by 30 November, 2015, 11.55pm IST

The challenge winner will receive a goodie bag from Lulupu.

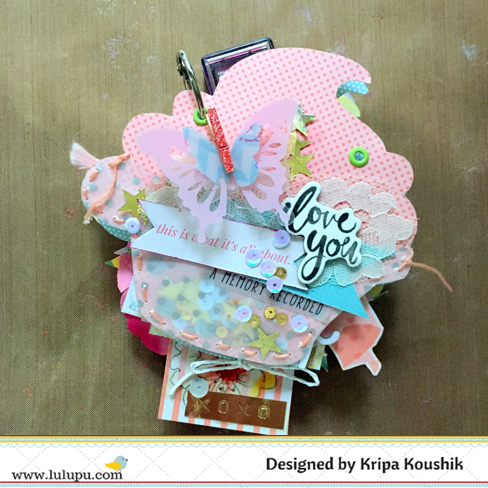
Ive made a cupcake shaped mini album and have a tutorial on creating the cover page and tips for decorating your albums.  Its not long post, but hope it brightens up your Monday :)
Are you ready to get started? Here is how the cover came into being.
Step1: Using a template, cut out cupcake outlines from Simple Life Echo Park 6x6 papers. These are double sided, so you already have a background for the other side.
Step2: Trace only the base of the cupcake ( not the cream) onto vellum or acetate. Handstich the vellum to one of the cupcake cutouts, I forgot to click, but you'll understand what I'm talking about in a minute. Fill it up with sequins - gold, grey. Ive also added some star confetti.
Step5: Seal shut with double sided tape. This part is a bit tricky, but patience pays :) in the form of clean finishing. You will now have something like this ( minus eyelets and stickers)

Next step is to create the focal points for each page aka embellishments. This was by far the most enjoyable and time consuming part of the project.
Ive used crate paper open book 12x12 papers and the ephemera pack and they matched  the colour theme quite well. My two tips when it comes to embellishments:
1. Mix and match  whatever is in your stash.
2. Layering - Experiment with combining  different materials  - lace, vellum, chipboard, acetate
Some details- the clothespin holding the butterfly had been glittered using the fine tip zig pen, the pinwheel  is held together  with American crafts glitter brad, the big heart sticker has an action wobble below it and finally the little moments base comes from Maggi Holmes ephemera packaging.
Can you see gold tape peeking through some of the layers- totally in love with this tape.

Using the crop-a-dile, attach green eyelets to all the pages. Finally assemble all the pages. Here is a close up of the pages.
  
And the other side.


In my second post this month, I will be taking you through more details of each page.
Supplies from the Lulupu store:


  Linkup


Friday, 6 February 2015

3D Cupcake Tutorial

Hello Everyone!!!

Manu here wishing you a happy month full of love and warmth!!

It's February already and Valentines day is just around the corner, did we mention that this month is the month of LOVE all around?? We did not wante to deviate from LULUPU's tradition of celebrating and circling this month around the lovey dovey creations, hence the challenge theme is : Love you SWEETS. You can find all the details of the challenge here.

Here's my take on this months theme!! I have created a cute little cupcake with a hidden message inside. I have a picture tutorial for all of you to enjoy and which is quite a big one too, so grab up your favorite beverage and enjoy this tutorial. 


Wondering where the message is??? Sit back and hold on, check out on how this pretty thing was made.

1. Here's the list of the things required to make this cupcake. 

  • You will be needing a thick cardstock or a sturdy packaging sheet from any box, about 8*8 inches(I used the hardcover of a Cadbury's celebrations gift pack), 
  • Pattern paper of your choice
  • A thermacol ball (I could not get it so used a Smiley ball for my project)
  • Double sided tape
  • Ribbons 
  • Love theme stamps
  • Pearls 
  • Flowers, glitters, liquid pearls (Embellishments of your choice)

2. Cut the Smiley ball in half and make sure to get an even cut throughout (the more even cut, the better).

3. Carefully line up small pieces of double sided tape (I lined up 2 pieces on top of each other to give me more space inside).

4. Now, cut a cardstock tag which fits in the 2 pieces of the ball when they are joined back together. You can always adjust the height. Make sure that this tag can slide in and can be pulled out easily when the ball is put back together.  (Still wondering on the Hidden message?? This might have given you an indication *wink wink)

5. I wanted my base for the cupcake to be a little stronger, hence I used a thick packaging cardstock. Draw a circle with diameter 6" and 2". Now, draw 8  lines  end to end (that makes 16 lines)as shown in the pic. Cut these lines till where the 2" circle is drawn. The next picture explains better.


6. Now hold all the elongated stripes and tie a rubber band to hold them, Also place your Smiley ball inside and make the desired shape for the cupcake. Carefully glue the flaps with one another and then when this step is done, glue the smiley ball along with this base structure of the cupcake. 


7. Cut out 2 stripes from the pattern paper of your choice and score them at 1/4" apart. Then fold them into an accordation fold. Paste this stripes of paper on the lower end of the base structure of the cupcake.


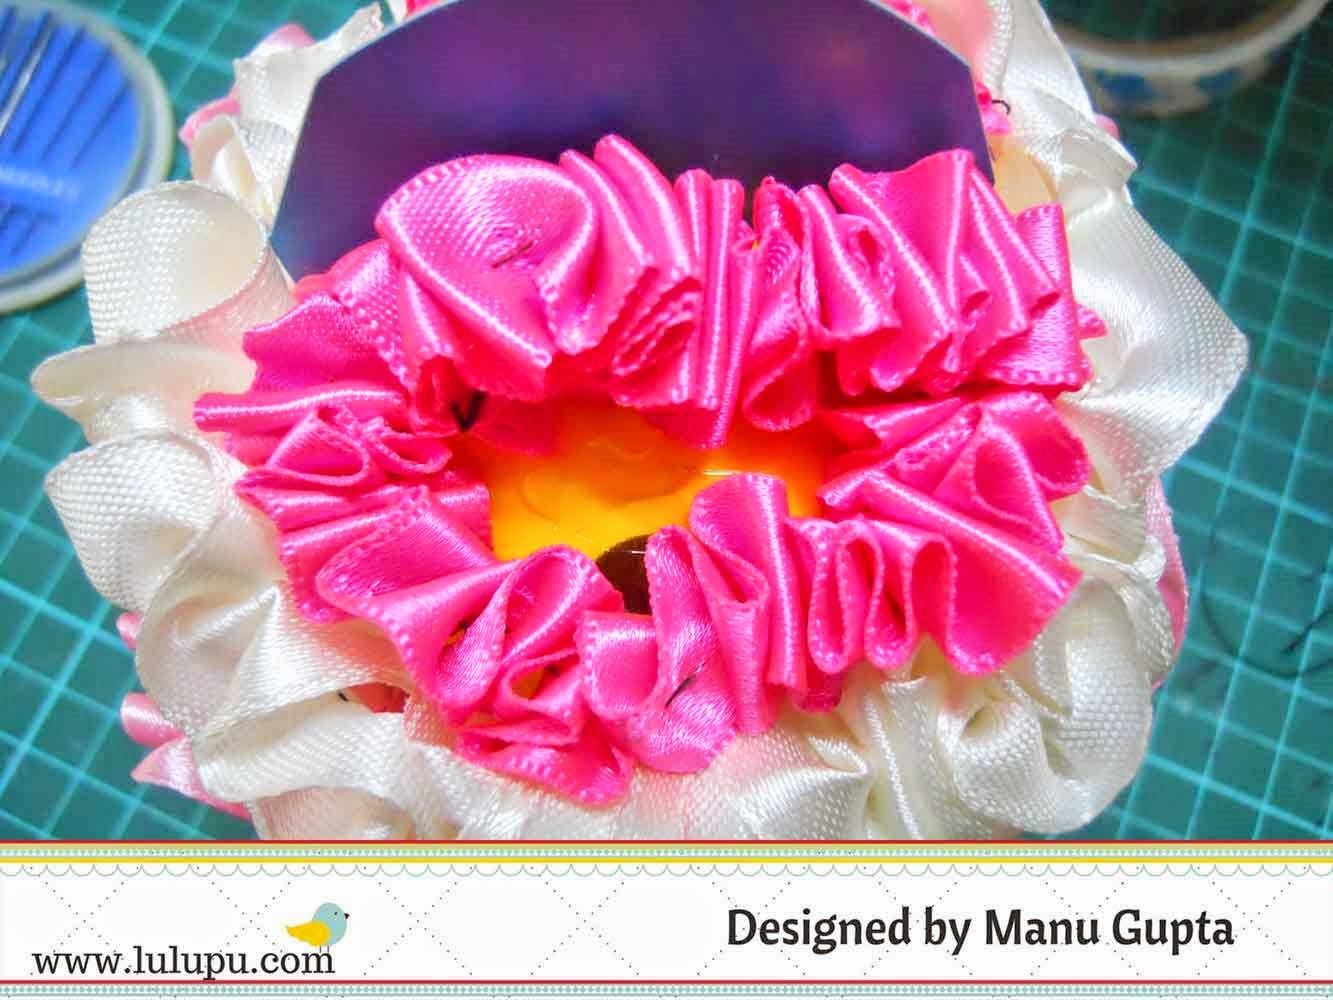
8. Now cut out a ribbon of your color choice about 4 -5 times the circumference of the smiley ball. We'll start with pasting this ribbon from the lower area where the pattern paper meets the smiley ball. Take the ribbon and pass your needle (with the thread in there, of course) and keep pulling the thread at regular intervals. You will end up getting a ruffled up ribbon like in the picture shown. 


9. Now attach the ribbon to the smiley ball with the help of the glue gun. Make sure that it covers the entire area nicely and the inside smiley is all hidden. I made the Cream ribbon ruffle similarly and pasted it. 


10.  Once you get to the edges of the tag(the one which slides in and out) attach the ribbon as shown in the pic both in front and at the back of the tag. This will ensure that the ribbon does not get entangle in the tag and ensures the smooth sliding of the tag. 


11. Ohh we forgot to make the tag, here's my sweet hidden tag inside the Smiley ball. 
Embellish your cupcake as desired.!!!


I used some pearls, glitter and more pearls on the ribbon (scattered here and there to look like cute sprinkling, ready to pop in the mouth).


Phew, that was one long tutorial!!! But I'm sure you must have liked it and do make your own cupcakes this Valentine's!!! 

I hope you all liked my cupcake and do not forget to tell me how this one tasted!!!
Do not forget to link back your entries here and get crafty and taste in the flavour of love all around!! 


Supplies used from the store: