Good morning friends,

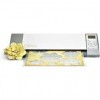
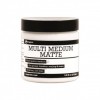
There really isn't much more to my layout. Washi tape stuck on packaging material is the layer behind the photographs. All the die cuts have been cut out of packaging material on the Silhouette Cameo and painted with black gesso. Finally, black glass glitter and sequins added using matt multi medium.
Supplies used from the Lulupu Store:
Kripa here from beautiful, sunny Sydney. Its starting to get warmer here and I couldnt be happier. Warmer weather also means my mixed media projects will dry quickly and I don't have to wait overnight. ( I don't use the heat tool unless embossing, heating gesso/ texture paste can create fumes which shudn't be inhaled in large quantities, and specially by kids)
Have you started creating your projects for this time's challenge yet...... its a very simple but interesting one:
Challenge #39
Black + White + a POP of one other colour
You can read the detailed post on the challenge here.
At first I was wondering how to create an interesting layout using just 3 colours ; texture and layers came to my rescue. There is no pattern paper on this layout - just washi tape and lots of packaging material from all the texture stamps I buy :) Here is a close up
No brownie points for guessing - the Pop colour is BLUE. Its amazing the tones of colour one can achieve from a single cake of watercolour - add water to get a subtle wash, create stains, add more colour to get a depth for splats.
Now, include a few more items - 3d gel, stamps, gesso and washi tape and you can create this. I forgot to take pictures while creating, but here is a step by step of how gel medium was used.

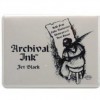
1. My base is watercolour paper. Randomly stamp Kaisercraft dictionary stamp or any other texture stamp. Lulupu has recently added some beautiful Kaisercraft texture stamps. Use Archival or Prima Resist chalk inks. These are permanent and wont react when painted over with watercolours. If however, you stamp with distress inks, it will react with the watercolour and change the original colour you are painting. (Now that gives a very cool effect too, but not what I wanted for this layout)
2. Place a stencil over the stamped area and apply 3d gel medium. Let dry completely.It dries transparent.
3. Paint over with watercolour. The gel medium will resist the paint and give a beautiful effect. The same techniques were used to create the blue tag tucked under the photos.
4. Outline some of the stenciled shapes, Stamp over the gel medium with a permanent ink or gesso.
There really isn't much more to my layout. Washi tape stuck on packaging material is the layer behind the photographs. All the die cuts have been cut out of packaging material on the Silhouette Cameo and painted with black gesso. Finally, black glass glitter and sequins added using matt multi medium.
If you have never used watercolours before, do give it a go. I bought myself a Mr Huey's watercolour set from Lulupu a few months ago and until then was super scared of free style painting. But now Im hooked - if I can do it, so can you.
I hope to have sparked your creativity in some way today. You can link your projects for this challenge here.
I hope to have sparked your creativity in some way today. You can link your projects for this challenge here.
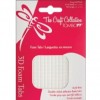
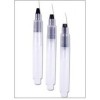
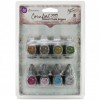
Supplies used from the Lulupu Store:



Nice layout and tutorial Kripa :) thank you so much
ReplyDeleteBeautiful layout, Kripa. Love the texture you have created with gel medium and water colors...Amazing!!
ReplyDeleteBlue color looks stunning with B&W.
Great inspiration for our challenge !!
WOnderful tutorial to achieve max effect with just one color..loved the idea of using packaging for layers
ReplyDelete