Hello everyone!
This is Hussena here and today, I am sharing with you all a layered card and flower tutorial. Here's a look at my card first :
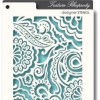
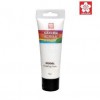
 The base of my card I have created with Memory Box Rhaposdy Stencil and Sakura Modelling Paste and I have added Distress ink- Salty Ocean to the paste to give that slight tinge of blue to it. The large flower is handmade for which I have shared the tutorial below.

This is Hussena here and today, I am sharing with you all a layered card and flower tutorial. Here's a look at my card first :
The tutorial I am sharing is for the central flower of my card.. First, let's gather the supplies. You will need :

1. Cardstock -I prefer working with water-color paper/ Paper more than 200gsm thickness.
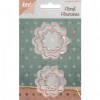
2. Joy! Crafts Floral Flourishes Die/ Flower dies or Three different size flower punches.
3. Distress inks -Tattered Rose/ Spun Sugar.
4. Inkessentials Blending tool.
5. Glossy Accents/ Glue of your choice.
6. A pair of small sharp scissors
7. A embossing tool and Forceps.
8. Water Spritzer/Mini Mister and a very broad handle paint brush.
Now, let's start with the tutorial :
1. Die cut your flowers or punch them out depending on what you are using. You will need TWO large size flowers, THREE medium and THREE small ones.
 2. With your scissors, cut a small slit in between the flowers as shown in the picture. Do this for ALL the flowers. Then, using your Ink Blending tool and Blending Foam distress/colour your flowers using Distress ink of your choice. I have used Spun Sugar and Tattered Rose.


 5. Now, using your tweezers, bend the two sides of the petal of the flowers into small curves. Do this for all of them. Then, we will start layering the flowers by gluing them one on top of the other.
 6. First, layer the large flowers followed by the three medium sized die-cuts and using your embossing tool press down the centre of the flower a shown in the picture.
 7. To create the centre bud of the flower, take one of the smaller sized flower die-cut and pull in two petals from the opposite side of the flower die-cut and mold it into a bud as shown. Apply a little glue on the two sides of the bud for it to hold the shape. Then, apply glue on the rest of the three petals and enclose the bud within it.
 8. Place this bud on to to a another small flower that we had embossed and squeeze it. Then, place a third layer of flower and you will end up with a tiny flower which looks like the one in the below picture.
 9. Now, place your tiny flower on to the medium size flower that we had layered above and this completes your flower :)

2. Joy! Crafts Floral Flourishes Die/ Flower dies or Three different size flower punches.
3. Distress inks -Tattered Rose/ Spun Sugar.
4. Inkessentials Blending tool.
5. Glossy Accents/ Glue of your choice.
6. A pair of small sharp scissors
7. A embossing tool and Forceps.
8. Water Spritzer/Mini Mister and a very broad handle paint brush.
Now, let's start with the tutorial :
1. Die cut your flowers or punch them out depending on what you are using. You will need TWO large size flowers, THREE medium and THREE small ones.
3. The, spritz the flower's with water using your mister and when the flower die-cuts are fully wet, place them on the broad end your paint brush as shown and using your forefinger and thumb, slightly crease the petals.
4. Let the flower die-cuts dry completely after creasing them. Then, using your embossing stylus emboss the petals and the middle of the flower creating a cup-like shape. These flower die-cuts will now hold the shape that you have molded them into as they have been water creased.
Hussena- Layered card supplies from www.lulupu.com :
 |  |  | |
 |  |  |  |
 |  |  | |
 |  |  |  |
 |  |  |
InLinkz.com
I hope you all like my card and tutorial. If you have any queries regarding any of the products used, then please leave me a comment below and I will try to answer your queries as soon as possible.
And, don't forget to participate in our Birthday Celebrations challenge! You still have time to play along with us :)
Have a nice day everyone!