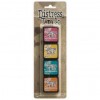
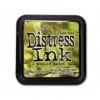
Hello dear friends! This is Deepti again with a photo tutorial
'How to create back grounds with Distress Inks'..
I think and feel that back grounds are very important to build a beautiful card. Today I'm going to show you very simple techniques on creating these backgrounds. And these techniques aren't mine, I've got inspired and learnt from many other talented crafters all around the blog world. As our current challenge 'Make it Macho' is all about Distress Inks so I thought why not share the techniques i know..(I'm not here to share a masculine project anyway).. If you already know these techniques kindly skip this post, so this post for those who wish to learn and this is especially for the newbies and the beginners to the love of Distress Inks.. <3
Well.. I'm gonna show you 5 cards with 5 different backgrounds and for each card I've used a different technique and I've divided them into 2 parts..
1. Creating a Monochromatic look (2 cards)
2. Misting technique (3 cards)
The basic technique I've used here is sponging.. Hope you guys are not getting confused!! ;)
Alright! let's jump into the procedure..
(picture heavy post)
1. Creating a Monochromatic Look
You can achieve this look by stamping and stenciling..
Stamping
Materials required
White cardstock, any stamp, your fav distress ink and a sponge dauber
I've sponged the background with peacock feathers distress inks.
Sorry my sponges are not that good..
Now I've stamped the butterfly with the same peacock feathers distress ink..
And that's it.. :)
Stenciling
Materials required
White cardstock, any stencil, Distress ink and a Sponge dauber
I've sponged with peeled paint distress ink..
then I took a stencil and sponged it with the same ink..
And that's it we are done with the monochromatic look.. :)
2. Misting Techniques
a. Distress inks reacts with water..
yes.. it reacts with water and it's such a cool and great technique
Materials required
White cs, distress ink, sponge dauber, clean water and a paint brush
I've sponged it with frayed burlap distress ink
Now place tiny drops of water or tap some water using a paint brush
And look how beautifully it reacts with water.. :)
The background just looks like some winter night, so I made a Christmas card..
b. Distress ink misting
Materials required
White cs, water mister bottle, two or more colors of distress inks and an acetate or craft sheet
Now rub the distress inks on to the acetate or craft sheet
Spray lots of water..
Now place the cardstock directly on to the misted area..
Now lift the paper and let it dry for sometime.. Isn't it cool..
And here is the card!
c. Acrylic block technique
Materials required
An acrylic block, Distress inks,water mister and a white cs..
Apply ink on to the acrylic block and spray water..
Now place it directly on to the cs and repeat the same with the other color..
Here is the card!
And that's it friends! Hope you like the techniques and the cards, hope you would give it a try and if you've already made something using these techniques kindly leave a comment below I shall get back to your blog soon.. If possible I'll be back with a few more techniques.. Until then take care and have fun.. ;)
Supplies Used


