Showing posts with label Challenge #47. Show all posts

Wednesday, 18 March 2015

Guest Designer: Tejal. Picture Tutorial -Shaker Card

Hey Friends,

Hello and welcome to another super exciting post by none other than Tejal, the butterfly and glitter girl as our featured guest designer. Yes, we all know her and pretty well. She is an amazing person and I love her detailed reviews about products we would love to hear a review about before we get them in out kitty!! If not, do connect with her and you will be glad to know more about her and also her love for glitters and butterflies!  

Also before I ask Tejal to take over, I hope you are enjoying Lulupu's 3rd Birthday bash celebrations and do make sure to check out all about the celebrations here and do not forget to follow all the guidelines to be eligible for your entry into the bumper raffle draw.  The Challenge for this month is 


Lets checkout what Tejal has in store for us.


Hello, its Tejal here joining the Birthday celebrations here at Lulupu.
We have a wonderful mood board up for the celebrations and the first thing I thought when I saw it, was I wanted some confetti somewhere...and I wanted balloons!! So combine that and I have a shaker card for you!!

 Let me take you along as I create not one but two shaker cards.

I started with two, because I wasn't sure how I wanted to go with it...so I played with both the cards and it may go from one card to another, but I'm sure you will get there in the end, and hopefully not confused by it! Let's do the shake it shake it baby!


So, it being Lulupu's 3rd birthday, I started with a cake...stamped it in Archival ink and colored with my distress inks. The stamp is from Hampton arts (and its on sale!! )and comes with a fabulous pennant stencil.


So now, I'm creating a background for my shaker card. I masked the cake with a post-it cut out.

The great part about this pennant stencil, is that it is SELF ADHESIVE..yes you read that right, no need to add masking tape to secure it down. Just peel and paste it on your work surface and you are good to go. Once you are done, just paste it back on the backing and it safe and secure!

I used two shades of distress inks to create my pennants..,shabby shutters and mowed lawn. (Please excuse that washi tape on my inkpads...I usually stick them on the inkpads after using stencils)


So this is what we get. Now this is where I went a little hay wire. I jumped from this background to the next card. Please forgive me for that. But here is where we start making the shaker component of our card.


This is my second card.. I simply masked off the edges with a 1 inch masking tape and used the pennant stencil to create a background. For the shaker window, I'm using a card piece which is slightly smaller than the background. You can use the same size card piece too, in this case
4 1/4 x5 1/2.
Using my exacto , I cut off an area in the centre to create my window.
TIP - You can use your square dies, oval dies, rectangle dies, word dies etc., to create fancy looking windows too.


 Now, cut a piece of transparency the same size as your window piece, (you can use Vellum too).
Run some red tape/score tape down the sides of the window.
Dry glue is always better with glossy surfaces like vellum or transparency.


 Over the transparency, we are now going to create a space for the shaker confetti!! So use double sided foam tape and add it around your window frame.
Keep it 1/4 inch away from the edge of the window, you don't want the foam showing through.


The most important part I feel for a shaker card when you are using double sided foam tape, is to make sure the confetti does not stick to the sides of the foam, which is usually sticky. 

I love love my new EK Success powder tool...just run the brush tip along the inside sides of the foam tape and your confetti will never stick to the tape! I even brush it across the inside of the transparency so there is no static on the plastic.


Since it is the 3rd birthday, I picked up some number confetti and just took all the number 3 from it...
and I glued a few on the transparency too!!

Remove the foam backing and stick your window piece on the background and your shaker card is done.

Now to embellish the card and ready it up!!


showing the scattered confetti


So here is my finished card...I took the 2nd  birthday cake (scroll back to the first picture) fussy cut it and glued it to the window.
Took a piece of vellum and gold embossed the Happy Birthday sentiment.
Stamped and fussy cut balloons, added twine. To finish up the balloons, I added Wink of stella in clear and glossy accents over the balloons!

The whole piece is glued on a black card base.

The piece which I abandoned in the 3rd step, here's how I finished that too..


scattered stars confetti


Here I took the window piece and stamped stars over it...stamped 3 balloons from the Hampton Arts set and fussy cut them.
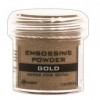
Heat embossed sentiment on vellum, with Gold embossing powder and hid the glue behind the balloons!
On the right, is how the confetti shakes out!!
Again, this whole window was glued to a black card base!

And we are done!! If you are still with me, Thank you Thank you Thank you!!!

So here are how I interpreted the mood board..
Techniques - Embossing
Materials - Twine
Embellishments - glitter (wink of stella and glossy accents)
Plus I have used the number 3 in first card, also 3 balloons on both the cards!!

Happy happy birthday Lulupu once again!! 


Wow, loved both the cards Tejal and thank you for the lovely tutorial. I'm sure you all are definitely gonna try the shaker cards now!! They are quirky, fun and yes, very very easy peasy to make! And yes, do not forget to take part in the celebrations !! Come join us in the fun!!

Hugs!
Manu


Friday, 6 March 2015

Explosion Box with a 3D cake : Tutorial

Hello Everyone!

This is Manu here and I have another exciting project to share with you all today! This month is all about celebrations here at Lulupu as it has been '3' years since the inception of lulupu, your favorite craft store, and we are having a blast celebrating !! We would love you all to join us and see what amazing inspirations we have in store for you guys! Ohh, between Lulupu store has an amazing sale going on and all your favorite craft supplies are now available at an amazing discount. So hurry up and stock up your supplies, you can check the sale here.

Here's the theme for this month's challenge, it had to be all Birthday related as we celebrate Lulupu's Birthday!! There is a lovely moodboard to pick up inspiration for your projects and yes, your projects needs to be something related to BIRTHDAY!


Here's what I made!!

A little birthday love for lulupu!! And yes, Birthday's are kind of incomplete without a cake, so I have a cake as well, here's my yumm cake!


Looks yummy, right??? So lets check out on how I made this one up !!! The Cake is actually a part of the Explosion box, hence I have an complete tutorial for the same! 

Here's how my box looks like!

Here are the steps for making this pretty box!! and yes, they make an awesome gift to gift someone (I love that element of surprise in there, when the 4 flaps opens up to reveal the pretty cake inside, and not to forget the amazing look in the eyes of the receiver!)

PS: This box measures 4*4 inches

1. Take a solid cardstock measuring 12*12 inches and score at 4" and 8" from one side, now flip it to the adjacent side and score at 4" and 8" again. Cut 4 side flaps to make a plus shape of the remaining cardstock. This will form the base of the box. 
To make the flap, take a cardstock measuring 7*7 inches and score at 1.25" from each side. Fold the sides and make a small mark of 1.25" from all the 4 sides and paste this small flap inside to make it look like a box lid. 

2. Now cut out your pattern paper to embellish the box! I have a layer of solid black cardstock beneath each cut out Pattern paper. This gives a nice little outline to the pattern paper. Stick up these papers on the base and on the lid of the box!! 

3. Now comes my most favorite part of the explosion box and that is the Cake. I'm always excited to make this one as each time I make a miniature paper cake, I end up loving it and wish that I could eat it up too!! 
To make the 3-tier cake, follow these steps. 
Base layer: cut out a solid cardstock measuring 5*5 inches and score at .75" at all the sides. Cut along the edge of the folded sides from 4 ends and paste it all. You will end up with the BOX LID kind of lid. This makes the base layer.
Middle layer: Cut out a solid cardstock 4.25*4.25 inches and score at .75" from each side. Make a similar structure like the base layer.
Top Layer: Cut out a solid cardstock measuring 3.5*3.5 inches and score at .75" from each side. Make a similar structure as the base layer. 
You will end up with the cake as in the picture below.

4. Your cake is ready!!! Let your imagination take a soar and embellish it!! This is how my finished box looks like!


Very easy peasy!!! Right??? I have always loved making these boxes for they are soo versatile and they looks so amazing! 

Lets look at how I interpreted the moodboard

1. Techniques: Distress look, Embossing
2. Materials: Lace
3. Embellishments: Pearl string, flowers, leaves, pollens
4. Shapes: Square(Box), oval(die-cuts)
5. Others: calligraphic font!

Ohh yes, I made a 3-tier cake (3 cakes) to represent the number '3' which marks Lulupu's 3rd Birthday Celebrations!!


I hope that you all liked my little treat and will try one for sure!! Do join us in the celebrations! Remember to enter into the Birthday Raffle here, and also checkout all about the rules and guidelines to enter into the challenge here.

Hugs!
Manu


Thursday, 5 March 2015

Guest Designer: Shilpa Nagaonkar plus a tutorial

Hi Friends

It's Manu here and I'm so happy to have Shilpa back here today, being featured as our guest designer!! You all know her pretty well and she is someone who needs no introduction. I'm myself in awe of her very pretty creations and love love love her mixed media! We sure truly love her mixed media, right!!! And that not all, throughout this whole month we will continue getting a lot more inspired for we have more inspirations for you! 
Before I ask Shilpa to take over, I'm sure that you are equally excited as we are to celebrate Lulupu's Birthday bash! Check out all about the celebrations here and do not forget to follow all the guidelines to be eligible for your entry into the bumper raffle draw(I'm actually waiting for the month end eagerly to see all your lovely creations!) The Challenge for this month is 


Check out the lovely Moodboard at the link above and now lets see what Shilpa has in store for us!


Hello Everyone, Its great to be back here at Lulupu, yes, its for Guest Designer Post Today.
I've created Mixed Media Gift Box inspired by Moodboard for this month's challenge.


I loved to use Teal color from Mood Board...further have pink and Gold in my project.Theme is to use '3'. I've used 3 Colors, 3 flowers, 3 leaves. 

Here is the step by step to create mixed media work on box


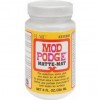
Originally this was a thick Kraft box. I applied a coat of Gesso. To create texture, I adhered paper Doilies and Gauze at random places with Matt Modge Podge.


Next layer is created with Wendy Vecchi white Embossing paste and Memory Box stencil.


When Embossing paste dried completely, I spritzed Lindy's inks in Mint and blue colors, used my heat tool to dry them. As we have gold color in Mood Board, I buffed acrylic gold with my fingers on raised areas of textured box


Lovely frame is from Prima, I colored it in gold and also have used Ranger Crackle Accent. You will find beautiful crackles if you zoom in the photo. 


My 3 sentiment cards go inside the box. They have a background created with Lindy's sprays, text and texture stamps, gold acrylic and stencil. 

That's it for now!! Hope you liked my project and get inspired! 
Don't forget to enter your project for Lulupu challenge this month to win fabulous prizes.

What a lovely project Shilpa, Loved the colors, the turquoise feel to the whole box!! 
I hope you all have enjoyed the pretty makeover of the box and would love to make one for yourself!! Go, try it and do show it to us!! 


Hugs!