Wednesday 28 May 2014

Guest Designer - Kathleen White

Hello Crafters,
Shilpa here,
Today we have Guest Designer  Kathleen White from, Texas,USA, who was the winner for our previous Layout challenge. She makes brilliant Scrapbook Layouts. Her creations are vintage, shabby chic or loaded with paints ,sprays and gesso...depending on her  inspiration on any given day.Today She is here to inspire us for 

 Over to Kathleen..


Greetings friends, Kathleen White here. Today's project is a modern take on a traditional 4th of July layout. I took this picture of my daughter and her husband last July and thought that I would make a 4th of July layout with it. Red, white and blue those were the colors I had in mind. 
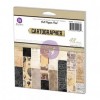
This 7 Dots Studio paper just had the right saying for an American layout."Make It Happen"


The Layout is inspired by the Movie "The Life and Time of Rosie the Riveter." It is a 1980  film by Connie Field about the American women who went to work during World War II to do "men's jobs". I've facination for that Era. Here are some more pics,


How I did it:
 Washi tape film style frames the pictures. I have mounted the picture red card stock and since I ran out of pop dots I used a piece of card board to raise it up giving it dimension. I cut out the lions to further frame my subject. I call them my MGM lions! The gears were inked in black and the one around the flag was also given some silver ink around the edges to make it stand out. The light was inked in black them the bottom or the bulb was sprayed in yellow and the surrounding area was also given a spray or two for the glowing light. This paint really has a beautiful shine to it. Tags are tuck into the sides for journaling. Black sewing thread was given a good wadding and stuffed up under the picture providing more texture and interest.

 Thank you for stopping by to see and hope it inspires you to join the challenge!

Monday 26 May 2014

Dry Embossing with Stencils - A tutorial

       Hello friends,

Kripa here, with my take on Lulupu Challenge #31 - Movie Inspiration. A quick recap of the challenge this fortnight


Please find the General rules here.. 

Qualification Guidelines
1. Only Cards and Layouts are allowed
2. Must use embossing folders or dry embossing or 
just score your card/LO using a bone folder or scorpal  or any embossing tool.
3. Kindly mention how you got inspired by the movie
4. Above all just have fun.. ;)

Do you remember the first dry embossing you did...... way back in school? Placing a Rs.1 coin under a sheet of paper, rubbing the top of the paper with a pencil and then grinning away when like magic the impression of the emblem appeared on the paper!

Well, when I saw the criteria for the challenge 'Dry Embossing', this was the first thing that popped into my head. So, instead of using an embossing folder, I used stencils to emboss - just like school days :) The added advantage of using stencils is that its very easy to control where in your card or layout you want to emboss. So, grab your favorite stencil, a scratch piece of paper, an embossing tool (or back of paint brush or eyelet setter or spoon) and give this a go alongwith me.


If you don't have a light source then place the stencil against a window and use the sun as the light source. The tool used to mark the outline will determine how  sharp or subtle the embossing effect will be. For a softer effect use the back of a spoon, for a sharp image like in the picture above go over the outline a couple of times with an embossing tool.

My card is based on the movie 127 HOURS. Its a true story of a mountain climber's adventure to save himself after a fallen boulder crashes on his arm and traps him in an isolated canyon in Utah. The grunge style, butterfly, gears and quote are all elements taken from the movie.

I gessoed a piece of Prima Cartographer paper and two plain manila tags before embossing them with Crafters Workshop gears template. Using a blending foam applied various shades of brown, black and yellow distress inks only on the raised embossed areas. This is how the card turned out finally.


Do let me know if you give this technique a go. I'd love to see your creation entered in this challenge. You have until 31st May to join the fun.


Supplies from Lulupu store:


Friday 23 May 2014

Snowhite inspired Card!

 Hello Friends,

Valou here,

Hope you are enjoying the beautiful creations by the design team members so far. Am totally excited about thsi challenge and i have decided to make a card inspired from the movie Snow white and the 7 Dwarfs! Here is my take on it...


Isn't the image really cute? I used an image " Sherri Baldy ", whom you can find HERE.


I have cut the image and stuck it on a die-cut created with" Spellbinders-Nestabilities - Majestic Ovals ".


For the rest of the decoration, I added the following flowers on which I added some touches of "Glitter Stickels Icicle":


The challenge links will remain open till May, 31st and I hope you join us!

Wednesday 21 May 2014

Movie Inspired Layout with Tutorial

Hello friends!
Jaya here.
Hope you are having fun at our current challenge at Lulupu
Lulupu challenge#31
Movie Inspiration
This is what I made for the challenge inspiration


I was inspired by he Movie The Black Swan. I loved the costumes, feathers, colours and the theme of the movie , so I decided to all a little bit of all that to my layout.


Here is the detailed tutorial of how I created my layout .Hope you will find it useful if you enjoy making layouts as much as I do!
How to Start?
 1. Select the picture you want to scrap. Don't have one matching your papers?? No need to worry. Photoshop the picture colours and hues to match your papers. I do it almost all the time!
2. Make a rough sketch that you will wan to follow for your layout. it makes the job much more easier.
3.Start your layout with giving textures to your background. Start with one dimensional( stamping, misting) and gradually progress toward three dimensional(modelling paste, stencilling)
4. Once satisfied with the mess ;) , start layering and assembling your picture and embellishments. You are done!
Here is a step by step tutorial on how I did my layout. hope you get a hold of layouts after this. Sorry for the poor quality of pictures. these were taken with mobile camera in the night. I didn't want to dirty my newly- gifted cam with my inky and gesso-ed  fingers. Lol!


1. First I added some gesso to my paper to make my background and then stamped some patterns with black archival ink .
2.Then I went a step further and heat embossed some damask and doily patterns.
USED-  
Prima -Crackle stencil on the edges,
Bubble wrap ,
Paper Mania Urban cling stamp-Doily


3.Next I added some more texture to my background with stencil and modelling paste.
USED-
Crafters workshop stencil- Reverse Honeycomb


4. I used my rangers heat tool to dry everything and then did some misting with the gorgeous Lindy's starburst sprays .
USED-


5. I dried my layout again and then gave some more textures with texture paste. unlike gesso this medium has body and withholds the shape. I dried it with heat tool and sprayed again with Lindy's starburst sprays on top of it.
USED-


6.Added some black acrylic paint mixed with glossy accents so that the drips withhold the shape. Again drying the whole thing. Also added some starburst sprays in pink hues.
USED-


7. Next I started with my layering and assembling of the picture and other embellishments. Used mdf cut-outs which I gesso-ed and sprayed with lindy's sprays. Once dry I added some crackle accents for more texture. Here I used embossed panels for my layering. These are dry embossed papers with some added techniques.
USED-

8. Once all the arrangement and embellishing was done my layout is complete!

Hope you liked the tutorial and found it useful. I will love if you try it out and let us know you did.
 You just need time and patience in making layouts as a layout is almost 4-5 times the work of a normal card. I take almost 6-8 hours to complete my layouts which is a lot of time and patience clubbed together!

 Do not forget to take part in our current challenge at Lulupu- Challenge#31-Movie Inspiration.
 
Supplies Used-
 

Tuesday 20 May 2014

Winners for Lulupu #30 Feminine Cards

Hello dear friends! This is Deepti here with the winners post.. Hope you are having fun with our current challenge.. Now it's time to announce the winners for Lulupu #30 Feminine Card Challenge. We had many beautiful entries.. Thank you ladies for taking your precious time to play along with our challenges.. :) 

We would like to give a entry an honourable mention and that is
Piyanki..

Your card is lovely Piyanki.. Keep up the good work.. :)

Now let me announce the top3 in no particular order..

Bhavana


Snehal


Erum
IMG_6086

Thank you dear ladies.. Your cards are really awesome. Please find and grab your badges from the sidebar..
We would like to offer the Guest Designer Spot to Erum. Your card is the prettiest and being an international crafter you win yourself a Guest Spot for the upcoming challenge.. Congrats ET.. :)

Now now..  much awaited part... Are you ready???
Alright! The winner is

Indira Tanwar...


You are awesome girl! Congrats.. Kindly write to hello@lulupu.com to claim your prize and don't forget to grab your badge from the side bar.. :)

There is still time to play along with our Movie Inspiration Challenge.. We would love to see your fun and beautiful entries.. Thank you so much.. <3