A big warm good morning to all your wonderful crafters out there! :)
Here's our new challenge for this fortnight :)
and here is a card that I made from my left over scraps and embellishments! The idea of this card is that you can make a totally new card from various bits and pieces lying around.
We have quite our way of using our scraps. For my part, I have a box in which I preserve quite the scraps of white papers and a dress handkerchief in which I preserve all the scraps of printed papers.
I use these pieces of papers only for dies or punchers. Nothing else.
Now, here is a tutoriel to realize my card 3-d.
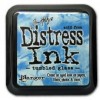
I colorized at first my two images with ink " Distress ".
I took scraps, and I drilled with a puncher border. I realized it 4 and I stuck them around my center.
I got back a waste of my title, and I stuck it as an in the corner top-right embellishment of my box.
We have quite our way of using our scraps. For my part, I have a box in which I preserve quite the scraps of white papers and a dress handkerchief in which I preserve all the scraps of printed papers.
I use these pieces of papers only for dies or punchers. Nothing else.
Now, here is a tutoriel to realize my card 3-d.
1. Draw in the white cartonnette, a square of 20 x 20 cms (8' x 8').
Draw in 1,25 cms (1/2 ') then in 2,5 cms (1') on each side with a plioir.
2. Draw a square in 5 cms (2') of the edge then an other one in 7,5 cms (3') of the edge also.
3. To cut corners as shows it the plan below.
4. Cut another piece of cartonnette of 12,7 cms and mark a line with the plioir in 1,25 cms 1/2 ') of the edge.
5. Cut edges to make flaps. It's your "part 1".
6. Stick flaps to form a small box. It's your "part 2".
7. Cut a piece of cartonnette of 30 cms (12') x 15 cms (6'). Fold it in two equal parts. It's your "part 3".
8. Take back the " part 1 " and cut both squares of the center in diagonal.
Well mark all the folds.
9. Stick flaps to end the base of your card.
10. Stick the " part 2 " in the center of the " part 1 ".
11. Finally, stick the " part 3 " behind your card.
Now, you do not have more than to dress your box - card according to your tastes.
I colorized at first my two images with ink " Distress ".
Then, I cut them with small scissors. I stuck my image "Scene" at the bottom of my card with some liquid glue.
Then, I stuck of " Blue Bazzil cardstock " on the edges of my box. I realized the same thing with a slightly smaller printed paper.
I stuck foam pieces 3-d behind the girl to stick it on my box and give to her of the volume.
I used two other scraps of "Bazzil Blanc" and I drilled borders "Butterflies" with a dies " Joy! Craft ". I inked them with some ink "Distress Walnut Stain" and I added them between my previous two papers.
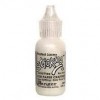
I stuck of the ribbon of given a pearly gloss pearls cream everything around the frame with of "Glossy Accents".
Then, with one scraps, me used a dies "Love" for the title.
For the decoration, I added a bow which I realized with a fall of ribbon " Blue Organza ". I then stuck various flowers. I covered them with "Glitter Stickels Icicle".
I got back a waste of my title, and I stuck it as an in the corner top-right embellishment of my box.
Thats all from me for today! :)
We hope you play along :)
Thank you for all the appreciation of my work, it inspires me to create more! :) Leave us some love :)
Welcome to Lulupu's Challenge #24 - Use your scraps
Please click on the blue box below by Inlinkz to add your entry with a direct link to the specific post. Thanks for participating! We'll hop on over to your blog soon to check it out! :)
Team Lulupu!
Supplies used
Supplies used




Beautiful card and tutorial Valou!
ReplyDeleteThank you very much Shilpa.
Deleteamazing tutorial Valou! Just makes us realize so much that can be done from our left over scraps!
ReplyDeleteSuch an amazing tutorial, Valou! I love the beautiful 3D card you have shown. Thank you so much for sharing the tutorial. Really enjoyed seeing your creative process!
ReplyDeleteI loved the 3d card Valou ! Thanks for the wonderful tutoial !
ReplyDeleteThank you very much all. :-)
ReplyDelete